SAMSUNG Chassis KS9A - ESpec
http://www.espec.ws/SAMSUNG chassis KS9A
COLOR TELEVISION RECEIVERChassis :Model :COLOR TELEVISION 2ZZXXEFCI21N112TZXXEUCONTENTS1. Precautions2. Specifications and IC Data3. Disassembly and Reassembly4. Alignment and Adjustment5. Troubleshooting6. Exploded View and Parts List7. Electrical Parts List8. Block Diagram9. Wiring Diagram10. Schematic Diagrams
Precautions1. PrecautionsFollow these safety, servicing and ESD precautions to prevent damage and protect against potentialhazards such as electrical shock and X-rays.1-1 Safety Precautions1. Be sure that all of the built-in protectivedevices are replaced. Restore any missingprotective shields.2. When reinstalling the chassis and itsassemblies, be sure to restore all protectivedevices, including: nonmetallic control knobsand compartment covers.3. Make sure that there are no cabinet openingsthrough which people—particularlychildren—might insert fingers and contactdangerous voltages. Such openings includethe spacing between the picture tube and thecabinet mask, excessively wide cabinetventilation slots, and improperly fitted backcovers.If the measured resistance is less than 1.0megohm or greater than 5.2 megohms, anabnormality exists that must be correctedbefore the unit is returned to the customer.4. Leakage Current Hot Check (Figure 1-1):Warning: Do not use an isolationtransformer during this test. Use a leakagecurrent tester or a metering system thatcomplies with American National StandardsInstitute (ANIS C101.1, Leakage Current forAppliances), and Underwriters Laboratories(UL Publication UL1410, 59.7).5. With the unit completely reassembled, plugthe AC line cord directly into the poweroutlet. With the unit’s AC switch first in theON position and then OFF, measure thecurrent between a known earth ground (metalwater pipe, conduit, etc.) and all exposedmetal parts, including: antennas, handlebrackets, metal cabinets, screwheads andcontrol shafts. The current measured shouldnot exceed 0.5 milliamp. Reverse the powerplug prongs in the AC outlet and repeat G SHOULDNOT BE ABOVE0.5mA)TEST ALLEXPOSED METALSURFACES2-WIRE CORDALSO TEST WITHPLUG REVERSED(USING AC ADAPTERPLUG AS REQUIRED)EARTHGROUNDFig. 1-1 AC Leakage Test6. Antenna Cold Check:With the unit’s AC plug disconnected from theAC source, connect an electrical jumper acrossthe two AC prongs. Connect one lead of theohmmeter to an AC prong. Connect the otherlead to the coaxial connector.7. X-ray Limits:The picture tube is especially designed to prohibit X-ray emissions. To ensure continuedX-ray protection, replace the picture tube onlywith one that is the same type as the original.Carefully reinstall the picture tube shields andmounting hardware; these also provide X-rayprotection.8. High Voltage Limits:High voltage must be measured each time servicing is done on the B , horizontal deflectionor high voltage circuits. Correct operation ofthe X-ray protection circuits must bereconfirmed whenever they are serviced.(X-ray protection circuits also may be called“horizontal disable” or “hold-down”.)Heed the high voltage limits. These includethe X–ray Protection Specifications Label, andthe Product Safety and X-ray Warning Note onthe service data schematic.1-1
Precautions1-1 Safety Precautions (Continued)9. High voltage is maintained within specifiedlimits by close-tolerance, safety-relatedcomponents and adjustments. If the highvoltage exceeds the specified limits, checkeach of the special components.10. Design Alteration Warning:Never alter or add to the mechanical orelectrical design of this unit. Example: Do notadd auxiliary audio or video connectors. Suchalterations might create a safety hazard. Also,any design changes or additions will void themanufacturer’s warranty.11. Hot Chassis Warning:Some TV receiver chassis are electricallyconnected directly to one conductor of the ACpower cord. If an isolation transformer is notused, these units may be safely serviced onlyif the AC power plug is inserted so that thechassis is connected to the ground side of theAC source.To confirm that the AC power plug is insertedcorrectly, do the following: Using an ACvoltmeter, measure the voltage between thechassis and a known earth ground. If thereading is greater than 1.0V, remove the ACpower plug, reverse its polarity and reinsert.Re-measure the voltage between the chassisand ground.12. Some TV chassis are designed to operate with85 volts AC between chassis and ground,regardless of the AC plug polarity. These unitscan be safely serviced only if an isolationtransformer inserted between the receiver andthe power source.13. Some TV chassis have a secondary groundsystem in addition to the main chassis ground.This secondary ground system is notisolated from the AC power line. The twoground systems are electrically separated byinsulating material that must not be defeatedor altered.15. Observe the original lead dress, especiallynear the following areas: Antenna wiring,sharp edges, and especially the AC and highvoltage power supplies. Always inspect forpinched, out-of-place, or frayed wiring. Donot change the spacing between componentsand the printed circuit board. Check the ACpower cord for damage. Make sure that leadsand components do not touch thermally hotparts.16. Picture Tube Implosion Warning:The picture tube in this receiver employs“integral implosion” protection. To ensurecontinued implosion protection, make surethat the replacement picture tube is the sameas the original.17. Do not remove, install or handle the picturetube without first putting on shatterproofgoggles equipped with side shields. Neverhandle the picture tube by its neck. Some“in-line” picture tubes are equipped with apermanently attached deflection yoke; do nottry to remove such “permanently attached”yokes from the picture tube.18. Product Safety Notice:Some electrical and mechanical parts havespecial safety-related characteristics whichmight not be obvious from visual inspection.These safety features and the protection theygive might be lost if the replacement component differs from the original—even if thereplacement is rated for higher voltage,wattage, etc.Components that are critical for safety areindicated in the circuit diagram by shading,() or ( ! ).Use replacement components that have thesame ratings, especially for flame resistanceand dielectric strength specifications.A replacement part that does not have thesame safety characteristics as the originalmight create shock, fire or other hazards.14. Components, parts and wiring that appear tohave overheated or that are otherwisedamaged should be replaced with parts thatmeet the original specifications. Alwaysdetermine the cause of damage or overheating, and correct any potential hazards.1-2Samsung Electronics
Precautions1-2 Servicing PrecautionsWarning1: First read the “Safety Precautions” section of this manual. If some unforeseen circumstance creates a conflict betweenthe servicing and safety precautions, always follow the safety precautions.Warning2: An electrolytic capacitor installed with the wrong polarity might explode.1. Servicing precautions are printed on thecabinet. Follow them.2. Always unplug the unit’s AC power cord fromthe AC power source before attempting to: (a)Remove or reinstall any component orassembly, (b) Disconnect an electrical plug orconnector, (c) Connect a test component inparallel with an electrolytic capacitor.3. Some components are raised above the printedcircuit board for safety. An insulation tube ortape is sometimes used. The internal wiring issometimes clamped to prevent contact withthermally hot components. Reinstall all suchelements to their original position.4. After servicing, always check that the screws,components and wiring have been correctlyreinstalled. Make sure that the portion aroundthe serviced part has not been damaged.5. Check the insulation between the blades of theAC plug and accessible conductive parts(examples: metal panels, input terminals andearphone jacks).6. Insulation Checking Procedure: Disconnect thepower cord from the AC source and turn thepower switch ON. Connect an insulationresistance meter (500V) to the blades of the ACplug.The insulation resistance between each bladeof the AC plug and accessible conductive parts(see above) should be greater than 1 megohm.7. Never defeat any of the B voltage interlocks.Do not apply AC power to the unit (or any ofits assemblies) unless all solid-state heat sinksare correctly installed.8. Always connect a test instrument’s groundlead to the instrument chassis ground beforeconnecting the positive lead; always removethe instrument’s ground lead last.1-3
Precautions1-3 Precautions for Electrostatically Sensitive Devices (ESDs)1. Some semiconductor (“solid state”) devicesare easily damaged by static electricity. Suchcomponents are called ElectrostaticallySensitive Devices (ESDs); examples includeintegrated circuits and some field-effecttransistors. The following techniques willreduce the occurrence of component damagecaused by static electricity.2. Immediately before handling any semiconductor components or assemblies, drain theelectrostatic charge from your body bytouching a known earth ground. Alternatively,wear a discharging wrist-strap device. (Besure to remove it prior to applying power—this is an electric shock precaution.)3. After removing an ESD-equipped assembly,place it on a conductive surface such asaluminum foil to prevent accumulation ofelectrostatic charge.4. Do not use freon-propelled chemicals. Thesecan generate electrical charges that damageESDs.1-45. Use only a grounded-tip soldering iron whensoldering or unsoldering ESDs.6. Use only an anti-static solder removal device.Many solder removal devices are not rated as“anti-static”; these can accumulate sufficientelectrical charge to damage ESDs.7. Do not remove a replacement ESD from itsprotective package until you are ready toinstall it. Most replacement ESDs arepackaged with leads that are electricallyshorted together by conductive foam,aluminum foil or other conductive materials.8. Immediately before removing the protectivematerial from the leads of a replacement ESD,touch the protective material to the chassis orcircuit assembly into which the device will beinstalled.9. Minimize body motions when handlingunpackaged replacement ESDs. Motions suchas brushing clothes together, or lifting a footfrom a carpeted floor can generate enoughstatic electricity to damage an ESD.Samsung Electronics
Specifications and IC Data2. Specifications and IC Data2-1 SpecificationsTelevision System:Channels:Intermediate Frequencies (MHz) :CIPAL-I (UHF)CIIPAL-I (VHF/UHF)CXPAL-B/G, SECAM-B/GCKPAL-B/G, D/K, SECAM-B/G, D/KCWPAL-B/G, D/K, SECAM-B/G, D/K, NT 4.43CSPAL-B/G, D/K, SECAM-B/G, D/K, NT4.43, NT3.58SystemBandPAL/SECAM- PAL,SECAM- D/KB/G,ISECAM-K1, NTSC - MPAL-DVHF2 - 121 - 132-92 - 13UHF21 - 6921 - 6913 - 5714-69PAL - INTSC - MSYSTEMIF Carrier FrequencyPicture Tube:SYSTEMMODELPAL/SECAM-D/K,PAL/SECAM- B/G SECAM-K1Picture IF Carrier38.9038.9038.9038.90Sound IF Carrier33.4032.4032.9034.40Color Sub Carrier34.4734.4734.4735.3214 InchA34KQV42XQuick start, in-line-gun,20 InchA48KRD82X(H)Black stripe, 90degree deflection21 InchA51KQJ63X21 FlatA51QDX993XPower Requirements:AC 160 300V, 50/60HzAntenna Input Impedance:VHF, UHF : Telescopic dipole antenna (75 ohm unbalanced type )Speaker Impedance8 ohm, 7W 7W (MAX)Samsung Electronics2-1
Specifications and IC Data2-2 IC Line UpTable 2-1 IC Line-UpLoc. NoSpecificationHC101PAP103DescriptionIF PRE-AMPSPM802ERTTX, ulgarian/Russian/PortugalSPM802ERNW/O TTX, ERTICAL OUTPUTSanyoIC501TDA6107QRGB DRIVE AMPPhilipsIC601TDA7266SSOUND-AMP (3W x 1CH or 3W x 2CH or 5W x 2CH)IC801SKA5Q0765RPOWER IC (STR)IC802KA7632CUSTOM REGULATOR (5V, 8V, 08 / LTV817BU4468BEEPROMPHOTO COUPLERSIF - ICTEMICSamsung Electronics
Specifications and IC Data2-3 Semiconductor Base DiagramsELECTROLYTICCONDENSERICDIODESPM-802ERN(Pin 64)SPM-802ER(Pin 64)X24CO8P(Pin 8)KS24C080(Pin 8)U4468B(Pin 8KTC9014UPC574JorKA33VE B 2010KTD863-YKSC2331-YE C BFig. 2-1 Semiconductor Base DiagramsSamsung Electronics2-3
Alignment and Adjustments4. Alignment and Adjustments4-1 Preadjustment4-1-1 Factory Mode4-1-3 When CRT Is Replaced1. Do not attempt these adjustments in the VideoMode.1. Make the following adjustments AFTER setting up after setting up purity and convergence :2. The Factory Mode adjustments are necessarywhen either the EEPROM (IC902) or the CRTis replaced.3. Do not tamper with the “Adjustment” screenof the Factory Mode menu. This screen isintended only for factory use.4-1-2 When EEPROM (IC902) Is Replaced1. When IC902 is replaced all adjustment datarevert to initial values. It is necessary tore-program this data.White BalanceSub-BrightnessVertical CenterVertical SizeHorizontal CenterFail Safe (This adjustment must be the laststep).2. If the EEPROM or CRT is replaced, set VA to40 (factory mode) and set SC to 24.2. After IC902 is replaced, warm up the TV for10 seconds.4-2 Factory/Service Mode4-2-1 Procedure for the “Adjustment” Mode4. Selection sequences for the all system:1. This mode uses the standard remote control.The Service Mode is activated by entering thefollowing remote-control sequence :(1) DISPLAY FACTORY.(2) STAND-BY DISPLAY MENU MUTE POWER ON.2. The “SERVICE (FACTORY)” message will bedisplayed. The Service Mode has five components: ADJUST, OPTION,OPTION1,G2 Adjustand Reset3. Access the Adjustment Mode by pressing the“VOLUME” keys ( Up or Down). The adjustment parameters are listed in the accompanying table, and selected by pressing the CHANNEL keys ( , ).Samsung ElectronicsDOWN or UP key:AGC SCT SBT BLR BLB RG GG BG VSL VS VA HS SC CDL STT AKB PDL NDL PSR NSR VOL LCO TXP MVOL FMWS AGCS OMD SCL PWL ACN PEK ACL FCD SCBT SSP PSNS5. The VOLUME keys increase or decrease theadjustment values (stored in thenon-volatile memory) when Adjustment Modeis cancelled.6. Cancel the Adjustment Mode by re-pressingthe “FACTORY” or “Power OFF” keys.4-1
Alignment and Adjustments4-2-2 Main Adjustment KACLFCOSCBTSSPPSNS4-2FUNCTIONRANGE INITIAL DATA REMARKRF AGC0 6333Sub contrast0 2313Sub brightness0 239Black level offset R0 6331Black level offset B0 6327White point R0 6332White point G0 6332(FIX)White point B0 6331Vertical slope0 6319Vertical shift0 6338Vertical amplitude0 6340(FIX)Horizontal shift0 6330S-correction0 6324Cathode drive level0 1512Sub tint0 77Black current stabilization0 10PAL delay0 151NTSC delay0 1510PAL sub color0 2315NTSC sub color0 2310Volume pre setting0 6310SECAM-L Vision IF0 10TTX Position0 159Melody initial volume adjustment0 5010Narrow-band sound PLL window selection 0 10IF AGC speed0 31Off-set IF demodulator0 6326Soft clipping level0 31Peak white limiting0 1512FM demodulator gain0 11Peaking center frequency0 32Automatic color limiting0 10Forced color limiting0 10Screen brightness0 6345Sub Sharpness gain adjustment0 2320Identify sensitivity PAL/NTSC decoder 0 11Samsung Electronics
Alignment and Adjustments4-2-3 Option BytesIn the Service Mode, various can be selected via the Option Table. Example:Option Table:XX XX XX XX1LNAON2SYSTEMCZ3AUDIOSTEREO4JACK5ZOOM6AUTO POWERON7SBLOFF82nd SIFON9HOTEL MODEOFF10BKSON11HIGH DEVIAON12HELP MENUON13TIMEON14V-GUARDOFFSamsung ElectronicsSCARTNOR/ZOOM/16:94-3
Alignment and Adjustments4-2-4 RESETThe Reset Mode is used during factory inspection.Function Reset:1.2.3.4.5.6.7.8.9.10.PictureAuto VolumeColor SystemSound SystemBlue ScreenLow Noise AMPVolumeCH. SkipCH. LockTimerCustomOffAuto (option)D/K (option)OffOff (option)10ErasedOffOff4-3 Other Adjustments4-3-1 General1. Usually, a color TV needs only slight touchup adjustment upon installation. Check thebasic characteristics such as height, horizontaland vertical sync and focus.2. The picture should have good black and whitedetails. There should be no objectionablecolor shading; if color shading is present, perform the purity and convergence adjustmentsdescribed below.3. Use the specified test equipment or its equivalent.4. Correct impedance matching is essential.5. Avoid overload. Excessive signal from a sweepgenerator might overload the front-end of theTV. When inserting signal markers, do notallow the marker generator to distort testresults.4-3-2 Automatic DegaussingA degaussing coil is mounted around the picture tube, so that external degaussing aftermoving the TV should be unnecessary. Butthe receiver must be properly degaussed uponinstallation.The degaussing coil operates for about 1 second after the power is switched ON. If the sethas been moved or turned in a different direction, disconnect its AC power for at least 30minutes.If the chassis or parts of the cabinet becomemagnetized, poor color purity will result. Ifthis happens, use an external degaussing coil.Slowly move the degaussing coil around thefaceplate of the picture tube and the sides andfront of the receiver. Slowly withdraw the coilto a distance of about 6 feet before removingpower.6. Connect the TV only to an AC power sourcewith voltage and frequency as specified on thebackcover nameplate.7. Do not attempt to connect or disconnect anywires while the TV is turned on. Make surethat the power cord is disconnected beforereplacing any parts.8. To protect against shock hazard, use an isolation transformer.4-4Samsung Electronics
Alignment and Adjustments4-3-3 High Voltage Check4-3-6 Purity AdjustmentCAUTION: There is no high voltage adjustment on this chassis.The B power supply must be set to 125 volts (Full color bar inputand normal picture level).1. Warm up the receiver for at least 20 minutes.1. Connect a digital voltmeter to the secondanode of the picture tube.2. Plug in the CRT deflection yoke and tightenthe clamp screw.3. Plug the convergence yoke into the CRT andset in as shown in Fig. 4-2.2. Turn on the TV. Set the Brightness andContrast controls to minimum (zero beam current).4. Input a black and white signal.3. The high voltage should not exceed 27.5KV.5. Fully demagnetize the receiver by applying anexternal degaussing coil.4. Adjust the Brightness and contrast controls toboth extremes. Ensure that the high voltagedoes not exceed 27.5KV under any conditions.6. Turn the CONTRAST and BRIGHTNESS controls to maximum.4-3-4 FOCUS Adjustment7. Loosen the clamp screw holding the yoke.Slide the yoke backward or forward to provide vertical green belt. (Fig. 4-3).1. Input a black and white signal.8. Tighten the convergence yoke.2. Adjust the tuning control for the clearest picture.3. Adjust the FOCUS control for well definedscanning lines in the center area of the screen.9. Slowly move the deflection yoke forward,and adjust for the best overall green screen.10. Temporarily tighten the deflection yoke.11. Produce blue and red rasters by adjusting thelow-light controls. Check for good purity ineach field.4-3-5 Cathode Voltage Adjustment(ScreenVoltageAdjustment)4-3-5 CathodeAdjustment(Screen Adjust)1. Connect CRT socket pin GK to an oscilloscopeprobe.1. Input a gray scale pattern.2. Input a gray scale pattern. (Use a pattern generator,PM5518)( Usea patterngenerator,PM5518)12. Tighten the deflection yoke.Use"Adjustment"the P mode key(on the remote control)2.3.EnterMode:for the STANDARD picture.(1) DISAPLAY FACTORY4. Adjust the Screen VR (on the FBT) so that the(2) STAND-BY DISAPALY MENUvoltage on the oscilloscope becomes 120 2.5V(See Fig. 4-1). MUT
12. Some TV chassis are designed to operate with 85 volts AC between chassis and ground, regardless of the AC plug polarity. These units can be safely serviced only if an isolation transformer inserted between the receiver and the power source. 13. Some TV chassis have a secondary ground system in addition to the main chassis ground.
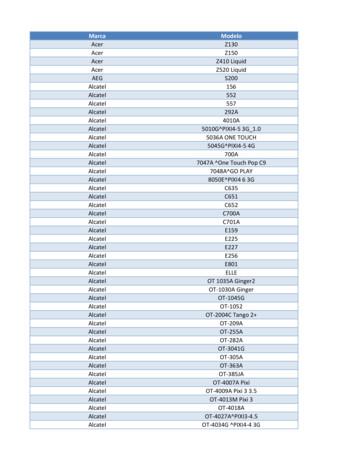
Samsung SGH-D807 Samsung SGH-D900 Samsung SGH-E215L Samsung SGH-E251L Samsung SGH-E256 Samsung SGH-E316 Samsung SGH-E356 Samsung SGH-E376 Samsung SGH-E496 Samsung SGH-E608 Samsung SGH-E630 Samsung SGH-E720 Samsung SGH-E736. Marca Modelo Samsung SGH-E786 Samsung SGH-E906 Samsung SGH-F250L Samsung SGH
Samsung Galaxy S6 (32GB) 100 Samsung Galaxy S5 60 Samsung Galaxy A9 Pro 250 Samsung Galaxy A8 100 Samsung Galaxy A7 2017 200 Samsung Galaxy A7 2016 130 Samsung Galaxy A7 50 Samsung Galaxy A5 2017 150 Samsung Galaxy A5 2016 100 Samsung Galaxy A5 50 Samsung Galaxy A3 2016 80 Samsung Galaxy
Samsung Electronics America (SEA), Inc. Address: 85 Challenger Road Ridgefield Park, New Jersey 07660 Phone: 1-800-SAMSUNG (726-7864) Internet Address: samsung.com 2016 Samsung Electronics America, Inc. Samsung, Samsung Galaxy, Multi Window, S Pen, S Health, S Voice, Samsung Pay, and Samsung Milk Music are all
4. Samsung Galaxy Watch Active User Manual Samsung Galaxy Watch Active User Manual - Download [optimized]Samsung Galaxy. 5. Samsung Galaxy Watch Active User Manual Samsung Galaxy Watch Active User Manual - Download [optimized]Samsung Galaxy. 6. SAMSUNG Galaxy Watch Active User Manual Samsung Galaxy Watch Active Quick Start Guide 1 .
Add a Samsung account. Sign in to your Samsung account to access exclusive Samsung content and make full use of Samsung apps. 1. From Settings, tap Accounts and backup Accounts. 2. Tap Add account Samsung account. TIP To quickly access your Samsung account, from. Settings tap Samsung account. Add an email account
Samsung Account . Create a Samsung account for access to Samsung content and apps on your device. When you turn on your device for the irst time, set up your existing Samsung account or create a new Samsung account. – or – To create a new Samsung account or set up your Samsung account on your device at any time, use Accounts settings.
SAMSUNG AU8000 Crystal UHD 4K Smart SAMSUNG AU8000 Crystal UHD 4K Smart Thank you for purchasing this Samsung product. To receive more complete service, please register your product at www.samsung.com Contact SAMSUNG WORLDWIDE If you have any questions or comments relating to Samsung products, please contact the Samsung service centre.
12 days F protect from light during storage 13 days F 1 g - 50 mL 1 g - 100 mL CEFAZOLIN7 Teva, Sandoz, Apo) NS CASPOFUNGIN1 (Cancidas ) 50 mg 10.5 mL SWFI 5 mg/mL AZTREONAM1,3 (Azactam ) 7 days F 24 hr F 30 days RT 500 mg/250 mL D5W MB D5W


