Get More Out Of Your CMM! - Smart Solutions
Get more out of your CMM!Upgrades & RetrofitsCoordinate Measuring machinesNIKON METROLOGY I VISION BEYOND PRECISION
BOOST YOUR CMM PERFORMANCEAn upgrade to your existing co-ordinate measuring machine canprovide many benefits without incurring the cost of purchasing anew machine.Most coordinate measuring machine structures will last in excess of 20 years due to the low levels of wearand tear through normal use however electronics, control systems and software quickly become outdatedas new technology is developed.Nikon Metrology can offer you a range of hardware and software upgrade options that will bring yourCMM back to life and provide many benefits including:INCREASED PRODUCTIVITYBy using the latest sensor technology and rapid programming software, a greater throughput can be achieved saving timeand money.REDUCED COSTUsing state-of-the-art electronics and control systems, maintenance and support costs can be lowered due to the higherreliability and reduced servicing time.BETTER INSIGHTSThe introduction of a Nikon non-contact laser scanner or a more efficient tactile probe system can provide a much higherlevel of measurement information giving you tighter control of your manufacturing processes.FUTURE-PROOFConfidence that your CMM will perform measurement tasks for today and in the future.COMPATIBILITY ACROSS MULTIPLE MEASURING DEVICESStandardising to a single measurement software on your manual and DCC CMMs plus portable arm CMMs can lead to areduced training and support burden and allow a more flexible use of your engineers.Upgrading to the Renishaw PH20 5-axistouch-trigger system provides the fastestCMM operation on the market.
WITH CONFIDENCEAll upgrades are covered by Nikon Metrology’s comprehensiveservice and support team and we can offer calibration,maintenance and helpdesk contracts to suit your requirement.CALIBRATIONOnce your machine has been upgraded, Nikon Metrology can offer a calibration service to maintain thehighest level of accuracy and repeatability. This can be as a ‘one-off’ visit or part of an ongoing calibrationcontract. Nikon Metrology is accredited under UKAS to ISO/IEC 17025:2005 to calibrate to ISO10360SERVICE AND REPAIRRegardless of the OEM of your CMM, after an upgrade our highly skilled engineers can offer a completemaintenance and repair service including spare parts to ensure your machine remains operational.MAINTENANCE CONTRACTSBoth hardware and software maintenance contracts can be provided to give you peace of mind thatyour system is always up-to-date. Software maintenance contracts provide continued access to the latestsoftware versions.TRAININGIt is important that following any upgrade your engineers have a good knowledge of the software andmachine operation. Full training by our experienced team of applications engineers is included withstandard and advanced courses available.TELEPHONE AND EMAIL HELPDESK SERVICEAfter all upgrades, unlimited telephone helpdesk support is available for the first 12 months givingconfidence that questions and problems can be answered with minimal delay.As well as our own brand co-ordinate measuring machines, we have performed upgrades on manyCMM brands including:Brown and zelZeissZETT MESS TechnikCMM-Manager upgrades may be possible without changing the existing CMM controller.Please contact your Nikon representative for more information.
CMM probingUsing modern probing technology can enhance your measurement capability inmany ways from simply offering automated stylus changing to faster measurementspeed with more accuracy.TP20/TP200 Stylus changing option Digital scanning for improvedfeature form inspectionSP25M Analogue scanning with datacollection rates up to 1000 pointsper second Faster inspection timesNikon L/LC/XC laser scanners Non-contact feature and surfaceinspection Increased productivity with betterinsights and full part-to-CADcomparisonPH20 (also see below) 5 axis touch trigger measurement Increased throughput and reducedcalibration timeREVO Dynamic scanning head withinfinite positioning for unparalleledflexibility Up to 50x faster than traditionalscanningCMM controllerWhether you want to upgrade your controller to replace old non-maintainablehardware or simply to give compatibility with the latest CMM hardware andsoftware products, upgrading to the latest generation of Nikon controllers providesmany advantages including: Blended machine moves to increase CMM performanceLatest error-mapping to guarantee CMM accuracyAccess to the latest probe technology for increased efficiencyCompatibility with the latest CMM programming softwareAutomated CMM operation (integration to robot loading etc.)Support for 4th axis rotary tables
WITH A NIKON CMM UPGRADECMM hardwareExisting motors and drives will often be compatible with new controller technologybut can be upgraded to offer improved reliability and performance if required.Measuring scales also do not always need replacement but can be upgraded toreplace old or damaged equipment when needed.CMM programming softwareThere are many benefits of upgrading your CMM software including: Reduced programming time with an easy-to-use intuitive user interface Integration to the latest versions of CAD formats Multi-sensor capability to use the right sensor for the inspection Increased productivity through offline programming The use of a single software platform across all your CMM’s and othermeasuring devicesNikon can offer two comprehensive software solutions to suit your inspectionrequirements.CMM-ManagerCAMIO Click and measure functionsQuick graphical reportingASME Y14.5 GD&T supportAdvanced path planningSmart collision avoidanceCompatible with many 3rd partycontrollers – no need to replaceyour existing CMM controller.Icon driven interfaceWizard based operationMulti-sensor capabilityFlexible graphical reportingDMIS based programmingFull CMM simulationwww.cmmmanager.comWorkstation and peripheralsA simple upgrade to the computer could provide a faster processing time toreduce the cycle time of running existing programs and increase the speed ofprinting the inspection report.
Upgrade-Retrofit EN 0615– Copyright Nikon Metrology NV 2015. All rights reserved. The materials presented here are summary in nature, subject to change and intended for general information only.NIKON METROLOGY NVNIKON CORPORATIONGeldenaaksebaan 329B-3001 Leuven, Belgiumphone: 32 16 74 01 00 fax: 32 16 74 01 03Sales.NM@nikon.comShinagawa Intercity Tower C, 2-15-3, Konan,Minato-ku, Tokyo 108-6290 Japanphone: 81-3-6433-3701 fax: 81-3-6433-3784www.nikon-instruments.jp/eng/NIKON METROLOGY EUROPE NVtel. 32 16 74 01 01Sales.Europe.NM@nikon.comNIKON METROLOGY, INC.tel. 1 810 2204360Sales.US.NM@nikon.comNIKON METROLOGY GMBHtel. 49 6023 91733-0Sales.Germany.NM@nikon.comNIKON METROLOGY UK LTD.tel. 44 1332 811349Sales.UK.NM@nikon.comNIKON METROLOGY SARLtel. 33 1 60 86 09 76Sales.France.NM@nikon.comNIKON INSTRUMENTS (SHANGHAI) CO. LTD.tel. 86 21 5836 0050tel. 86 10 5869 2255 (Beijing office)tel. 86 20 3882 0550 (Guangzhou office)NIKON SINGAPORE PTE. LTD.tel. 65 6559 3618nsg.industrial-sales@nikon.comNIKON MALAYSIA SDN. BHD.tel. 60 3 7809 3609NIKON INSTRUMENTS KOREA CO. LTD.tel. 82 2 2186 8400More offices and resellers at www.nikonmetrology.com
BOOST YOUR CMM PERFORMANCE WITH A NIKON CMM UPGRADE Most coordinate measuring machine structures will last in excess of 20 years due to the low levels of wear and tear through norma
speakoutTIP The verb get has more than twenty meanings in English! It can mean ‘become’ (get hungry), ‘arrive’ (get home), ‘obtain’ (get a job), ‘buy’ (get a new car) and is in many phrases: get up, get on a plane, get dressed. When you hear or see the word get, think about which meaning it has. Which meaning does get have in these
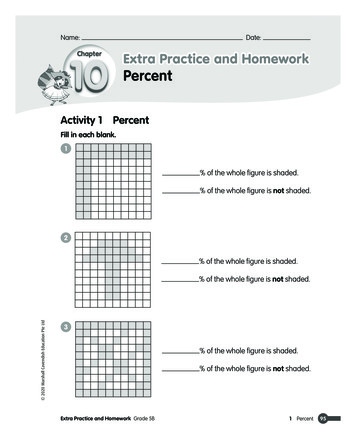
7 Shade 50% of the whole figure. 8 Shade 75% of the whole figure. Fill in each blank. 9 43 out of 100 % 10 out of 100 1% 11 5 out of 100 % 12 out of 100 10% 13 90 out of 100 % 14 out of 100 87% 15 21 out of 100 % 16 out of 100 2% 17 8 out of 100 % 18 out of 100 3% 19 4 out of 100 % 20 out of 100 9% 21 35 out of 100
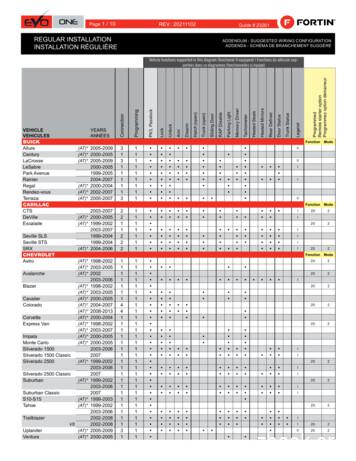
Yellow In A1 Purple Out A2 Purple/White Out A3 Green Out A4 White Out A5 Orange Out A6 Orange/Black Out A7 Dk.Blue Out A8 Red/Blue In A9 Lt.Blue/Black In/Out A10 Black In A11 Pink Out A12 Yellow/Black Out A13 Brown/White In A14 Pink/Black In A15 Purple/Yellow In/Out A16 Green/White In/Out A17 Green/Red In/Out A18 White/
NC COM 0 1 COM 0 COM 1 V A0 Ao-B0 V -V COM COM COM B0-Z0 Z0-A1 A1-B1 B1-Z1 Z1-OUT 0 2 I OUT 0 V OUT 0 V OUT 0 0 V OUT 0 V OUT 0 V V OUT 0 V OUT 0 OUT 0 V OUT 0 V OUT 0 OUT 3 EtherNet/IP On-Machine When using the full Rockwell Automation solution including Studio 5000 Logix Designer
OC.1uF GND IN IN EN TPS2014 OUT OUT OUT OC D D-5V 150uF GND D D-5V 150uF GND D D-5V 150uF GND GND IN IN EN TPS2014 OUT OUT OUT OC.1uF.1uF 5V 1000uF opt. D D-5V 150uF GND GND IN IN EN TPS2014 OUT OUT OUT OC.1uF NOTE: Low drop-out Voltage Regulators may be required for powering Hub Contro
After you get the access token, use it to verify user roles. This chapter includes the following topics: n Get Your Access Token for the vRealize Automation API n Verify User Roles Get Your Access Token for the vRealize Automation API To get the token used to authenticate your session, you use the Identity Service API to get an API token.
The More You Get Out of This Book, the More You'll Get Out of life! In order to get the most out of this book: a. Develop a deep, driving desire to master the principles of huma
ftp uiarchive.cso.uiuc.edu login: anonymous password: your@login cd etext/etext90 through /etext96 or cd etext/articles [get suggest gut for more information] dir [to see files] get or mget [to get files. . .set bin for zip files] GET INDEX?00.GUT for a list of books and GET NEW GUT for general information and MGET GUT* for newsletters.

