Samsung Galaxy Amp 2 J120AZ User Manual
SMARTPHONEUser ManualPlease read this manual before operating your deviceand keep it for future reference.
Legal NoticesDisclaimer of Warranties;Exclusion of LiabilityWARNING! This product contains chemicals known tothe State of California to cause cancer, birth defects,or other reproductive harm. For more information,please call 1-800-SAMSUNG (726-7864).EXCEPT AS SET FORTH IN THE EXPRESSWARRANTY CONTAINED ON THE WARRANTYPAGE ENCLOSED WITH THE PRODUCT, THEPURCHASER TAKES THE PRODUCT “AS IS”, ANDSAMSUNG MAKES NO EXPRESS OR IMPLIEDWARRANTY OF ANY KIND WHATSOEVER WITHRESPECT TO THE PRODUCT, INCLUDING BUTNOT LIMITED TO THE MERCHANTABILITY OF THEPRODUCT OR ITS FITNESS FOR ANY PARTICULARPURPOSE OR USE; THE DESIGN, CONDITION ORQUALITY OF THE PRODUCT; THE PERFORMANCEOF THE PRODUCT; THE WORKMANSHIP OF THEPRODUCT OR THE COMPONENTS CONTAINEDTHEREIN; OR COMPLIANCE OF THE PRODUCTWITH THE REQUIREMENTS OF ANY LAW, RULE,SPECIFICATION OR CONTRACT PERTAININGTHERETO. NOTHING CONTAINED IN THEINSTRUCTION MANUAL SHALL BE CONSTRUEDTO CREATE AN EXPRESS OR IMPLIED WARRANTYOF ANY KIND WHATSOEVER WITH RESPECT TOTHE PRODUCT. IN ADDITION, SAMSUNG SHALLNOT BE LIABLE FOR ANY DAMAGES OF ANY KINDRESULTING FROM THE PURCHASE OR USE OFTHE PRODUCT OR ARISING FROM THE BREACHOF THE EXPRESS WARRANTY, INCLUDINGINCIDENTAL, SPECIAL OR CONSEQUENTIALDAMAGES, OR LOSS OF ANTICIPATED PROFITSOR BENEFITS.Intellectual PropertyAll Intellectual Property, as defined below, ownedby or which is otherwise the property of Samsungor its respective suppliers relating to the SAMSUNGPhone, including but not limited to, accessories,parts, or software relating there to (the “PhoneSystem”), is proprietary to Samsung and protectedunder federal laws, state laws, and internationaltreaty provisions. Intellectual Property includes,but is not limited to, inventions (patentable orunpatentable), patents, trade secrets, copyrights,software, computer programs, and relateddocumentation and other works of authorship. Youmay not infringe or otherwise violate the rightssecured by the Intellectual Property. Moreover,you agree that you will not (and will not attemptto) modify, prepare derivative works of, reverseengineer, decompile, disassemble, or otherwiseattempt to create source code from the software.No title to or ownership in the Intellectual Propertyis transferred to you. All applicable rights of theIntellectual Property shall remain with SAMSUNGand its suppliers.Open Source SoftwareSome software components of this productincorporate source code covered underGNU General Public License (GPL), GNULesser General Public License (LGPL),OpenSSL License, BSD License and otheropen source licenses. To obtain the sourcecode covered under the open source licenses,please visit: opensource.samsung.comLegal NoticesModification of SoftwareSAMSUNG IS NOT LIABLE FOR PERFORMANCEISSUES OR INCOMPATIBILITIES CAUSED BYYOUR EDITING OF REGISTRY SETTINGS, ORYOUR MODIFICATION OF OPERATING SYSTEMSOFTWARE.USING CUSTOM OPERATING SYSTEM SOFTWAREMAY CAUSE YOUR DEVICE AND APPLICATIONSTO WORK IMPROPERLY. YOUR CARRIER MAYNOT PERMIT USERS TO DOWNLOAD CERTAINSOFTWARE, SUCH AS CUSTOM OS.iCKT J120AZ EN UM TN PB6 031416 FINAL
Notice from CricketSamsung Electronics America(SEA), Inc.Your device is designed to make it easy for youto access a wide variety of content. For yourprotection, we want you to be aware that someapplications that you enable may involve the locationof your device being shared. For applicationsavailable through Cricket, we offer privacy controlsthat let you decide how an application may usethe location of your device and other devices onyour account. However, the Cricket privacy toolsdo not apply to applications available outside ofCricket. Please review the terms and conditionsand the associated privacy policy for each locationbased service to learn how location information willbe used and protected. In addition, your Cricketdevice may be used to access the Internet and todownload, and/or purchase goods, applications,and services from Cricket or elsewhere from thirdparties. Cricket provides tools for you to controlaccess to the Internet and certain Internet content.These controls may not be available for certaindevices which bypass Cricket controls.Address:85 Challenger RoadRidgefield Park,New Jersey 07660Phone:1-800-SAMSUNG (726-7864)Internet Address:samsung.com 2016 Samsung Electronics America, Inc.Samsung and Samsung Galaxy are trademarks ofSamsung Electronics Co., Ltd.Other marks are the property of their respectiveowners.Note: Screen images are simulated. Appearance ofdevice may vary. 2016 Cricket Wireless LLC. All rights reserved.Cricket and the Cricket logo are registeredtrademarks under license to Cricket Wireless LLC.[031016]Do you have questions about yourSamsung Mobile Device?Samsung KNOXFor 24 hour information and assistance, we offera new FAQ/ARS System (Automated ResponseSystem) at: samsung.com/us/supportSamsung KNOX is Samsung’s security platformand is a mark for a Samsung device tested forsecurity with enterprise use in mind. Additionallicensing fee may be required. For more informationabout KNOX, please refer to: samsung.com/us/knox[030115]Legal NoticesThe actual available capacity of the internal memoryis less than the specified capacity because theoperating system and default applications occupypart of the memory. The available capacity maychange when you upgrade the device.ii
Legal InformationImportant legal information can be accessed inwriting on the mobile device or at samsung.comREAD THIS INFORMATION BEFORE USING YOURMOBILE DEVICE.Samsung Limited Warranty - This product iscovered under the applicable Samsung LimitedWarranty INCLUDING ITS DISPUTE RESOLUTIONPROCEDURE and your right to opt out ofarbitration within 30 calendar days of the firstconsumer purchase. You may opt out by eithersending an email to optout@sea.samsung.comwith the subject line “Arbitration Opt-Out” or bycalling 1-800-SAMSUNG (726-7864). For moredetailed procedures, please refer to the “DisputeResolution Procedures and Arbitration and Opt-Out”section of the Limited Warranty.Full written terms and detailed information aboutthe warranty and obtaining service are available onthe device at: Settings System About device Legal information Samsung legal or you mayaccess the online version of the Health/Safety andWarranty guide for your device hsamsung.com/us/Legal/Phone-HSGuide-SPThe online version of the End User LicenseAgreement (EULA) for your device can be foundonline at:samsung.com/us/Legal/SamsungLegal-EULA4Legal Noticesiii
Table of ContentsGetting Started.1Internet. 52Front View.2Back View.3Assemble Your Device.4Set Up Your Device.7Set Up Accounts on Your Device.8Memo. 54Messages. 55My Files. 57Voice Recorder. 58Settings. 59Know Your Device.9How to Use Settings. 60Home Screen. 10Status Bar. 13Navigation. 14Notification Panel. 16Enter Text. 18Wi‑Fi. 61Bluetooth. 63Airplane Mode. 65Mobile Hotspot and Tethering. 66Data Usage. 68Mobile Networks. 69Calling. 20More Connection Settings. 70Phone Screen. 21Make and Answer Calls. 23Speed Dial. 26Emergency Calls. 27Set Up and Access Voicemail. 28Sounds and Vibration. 72Notifications. 75Display. 76Advanced Features. 78Applications Settings. 79Applications. 29Wallpaper. 81Apps List. 30Google Apps. 32Cricket Apps. 34Calculator. 35Calendar. 36Camera and Video. 38Clock. 41Contacts. 43Email. 47Galaxy Apps. 49Gallery. 50Home Screen Settings. 82Table of ContentsLock Screen and Security. 83Privacy and Safety. 87Accessibility. 89Accounts. 91Backup and Reset. 92Language and Input. 94Battery. 96Storage. 97Date and Time. 99About Device.100iv
Getting StartedLearn about yourmobile device hardware,assembly procedures, andhow to get started usingyour new device.
Front ViewProximity sensorsEarpieceFront cameraVolume keyPower keyBackRecentHome key Proximity sensors: Detect the presence of Recent: Tap to display recent apps. Volume key: Adjust the volume of your device’sobjects near the device. Front camera: Take self-portraits and recordsounds and audio playback.videos of yourself. Earpiece: Listen to a call. Power key: Press and hold to turn the device onor off, or to restart it. Press to lock or wake up thescreen. Back: Return to the previous screen or close adialog box, menu, or keyboard. Home key: Return to the Home screen.Getting Started2Front View
Back ViewMicrophoneHeadset jackRear cameraSpeakerFlashUSB charger/Accessory portMicrophone Headset jack: Connect an optional headset Microphone: Record audio and detect voice Rear camera: Take pictures and record videos. Flash: Illuminate subjects in low-light Speaker: Play music and other sounds.(not included).commands.environments when taking a photo or recordingvideo. USB charger/Accessory port: Connect theUSB charger (included) and other optionalaccessories (not included).Getting Started3Back View
Assemble Your DeviceInstall the SIM CardThis section helps you toassemble your device.When you subscribe to a cellular network, you areprovided with a plug-in SIM card. During activation,your SIM card is loaded with your subscriptiondetails, such as your Personal Identification Number(PIN), available optional services, and otherfeatures.Remove the Back Cover1. Remove the back cover using the slot on thetop left of your device.Warning: Please be careful when handling theSIM card to avoid damaging it. Keep all SIM cardsout of reach of small children.2. Lift the cover up and to the right of the device. Carefully slide the SIM card into the SIM cardslot.Warning: Do not bend or twist the back coverexcessively. Doing so may damage the cover. Make sure that the card’s gold contacts facedown into the device and that the card ispositioned as shown.Caution: If the SIM card is not inserted correctly, thedevice cannot detect it. Reorient the card and place itback into the slot if the SIM is not detected.Getting Started4Assemble Your Device
Install a Memory CardReplace the Back CoverYou can install an optional microSD ormicroSDHC memory card (not included) to addmore memory space to your device.1. Place the back cover onto the back of the deviceand press down. Note: A memory card can be installed at any time.It is not necessary to install it prior to using the device.2. Press along the edge of the back cover until youhave a secure seal.Charge the Battery1. Remove the back cover. For more information,see Remove the Back Cover.Your device is powered by a rechargeable, standardLi-Ion battery. A USB charger (charging head andUSB cable) is included with the device for chargingthe battery from any standard outlet.2. Slide the memory card into the slot with the goldcontacts facing down.3. Replace the back cover. For more information,see Replace the Back Cover.The battery comes partially charged. A fullydischarged battery requires up to four hours ofcharge time. You can use the device while charging.Install the BatteryNote: It is recommended you fully charge the batterybefore using your device for the first time.1. Insert the battery into the opening on the back ofthe device, making sure the connectors align.Caution: Use only charging devices and batteriesapproved by Samsung . Samsung accessories aredesigned for your device to maximize battery life.Using other accessories may invalidate your warrantyand may cause damage.2. Gently press down to secure the battery.Getting Started5Assemble Your Device
When to Charge the Battery1. Insert the USB cable into the port.When the battery is low and only a few minutes ofoperation remain, the device sounds a warning toneat regular intervals.In this condition, your device conserves itsremaining battery power by dimming the screen.When the battery level becomes too low, the deviceautomatically turns off.For a quick check of your battery level: View the battery charge indicator located in thetop right corner of your device’s display. A solidcolor ( ) indicates a full charge.2. Connect the USB cable to the charginghead, and then plug the charging head into astandard outlet.You can also choose to display a percentagevalue. Viewing a percentage value can providea better idea of the remaining charge on thebattery. For more information, see Battery.3. Unplug the charging head from the outlet andremove the USB cable from the device whencharging is complete.Note: This device is also compatible with wirelesscharging devices approved by Samsung, which aresold separately.Getting Started6Assemble Your Device
Set Up Your DeviceTurn Your Device On or OffNote: Voice Assistant provides voice prompts anddescriptions of items on the screen to improveaccessibility. During setup, you can enable or disableVoice Assistant by pressing the Home key quicklythree times.The instructions below explain how to turn yourdevice on or off.Turn the Device OnSecure Your DeviceTo turn the device on: Press and hold the Power key until the deviceturns on.Use your device’s screen lock features to secureyour device.Turn the Device OffLock the DeviceTo turn the device off:By default, the device locks automatically when thescreen times out.1. Press and hold the Power key until theDevice options menu is displayed.To lock the device:2. Tap Power off, and confirm if prompted. Press the Power key.Reset the DeviceUnlock the DeviceIf your device stops responding to taps or fingergestures and you are unable to turn it off, you canreset your device.The default Screen lock on your device is Swipe.Note: To choose a more secure screen lock, seeSet a Screen Lock. Press and hold the Power key and theVolume down key at the same time formore than seven seconds.To unlock the device: Press the Power key or Home key, and thendrag your finger across the screen.Initial Set UpThe first time you turn your device on, a Welcomescreen is displayed. It guides you through the basicsof setting up your device.Follow the prompts to choose a default language,connect to a Wi-Fi network, set up accounts,choose location services, learn about your device’sfeatures, and more.Getting Started7Set Up Your Device
Set Up Accounts on Your DeviceSamsung AccountFactory Reset ProtectionCreate a Samsung account for access to Samsungcontent and apps on your device. When you turn onyour device for the first time, set up your existingSamsung account or create a new Samsungaccount.When you sign in to a Google Account on yourdevice, Factory Reset Protection is turned on.Factory Reset Protection (FRP) prevents otherpeople from using your device if it is reset to factorysettings without your permission. For example, ifyour device is lost or stolen and a factory datareset is performed, only someone with yourGoogle Account username and password can usethe device.– or –To create a new Samsung account or set up yourSamsung account on your device at any time,use Accounts settings. For more information,see Accounts.You will not be able to access the device aftera factory data reset if you do not have yourGoogle Account username and password. For moreinformation, see Factory Data Reset. From a Home screen, tapApps Settings Personal Accounts Add account Samsung account.Google AccountCaution: You should remove your Google Accountbefore shipping your device to Samsung or any otherservice provider for service and before resetting thedevice to factory settings.Your new device uses your Google Account tofully utilize its Android features, including Gmail ,Google Hangouts , and the Google Play store.Enable Factory Reset ProtectionAdding a Google Account to your deviceautomatically turns on the Factory Reset Protection(FRP) security feature. For more information,see google.com.When you turn on your device for the first time, setup your existing Google Account or create a newGoogle Account.– or –To create a new Google Account or set up yourGoogle Account on your device at any time,use Accounts settings. For more information,see Accounts.Disable Factory Reset Protection From a Home screen, tapApps Settings Personal Accounts Add account Google.1. From a Home screen, tapSettings Personal.To disable FRP, remove all Google Accounts fromthe device.Apps 2. Tap Accounts Google.3. Tap More Remove account.Getting Started8Set Up Accounts on Your Device
Know Your DeviceLearn some of the keyfeatures of your mobiledevice, including thescreens and icons, aswell as how to navigatethe device and enter textusing the keyboard.Warning: Please note that a touch screenresponds best to a light touch from the padof your finger or a capacitive stylus. Usingexcessive force or a metallic object whenpressing on the touch screen may damagethe tempered glass surface and void thewarranty.
Home ScreenThe Home screen is the starting point for using your device.Notification iconsStatus iconsStatus barWidgetApp folderApp shortcutsHome screen indicatorApps listPrimary app shortcuts Status icons: Displays information about the Home screen indicator: Indi
have a secure seal. Charge the Battery Your device is powered by a rechargeable, standard . Li-Ion battery. A USB charger (charging head and USB cable) is included with the device for charging the battery from any standard outlet. The battery comes partially charged. A fully .
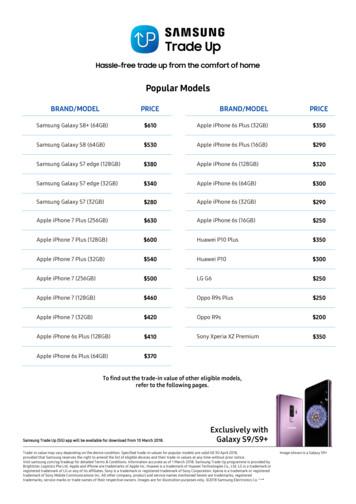
Samsung Galaxy S6 (32GB) 100 Samsung Galaxy S5 60 Samsung Galaxy A9 Pro 250 Samsung Galaxy A8 100 Samsung Galaxy A7 2017 200 Samsung Galaxy A7 2016 130 Samsung Galaxy A7 50 Samsung Galaxy A5 2017 150 Samsung Galaxy A5 2016 100 Samsung Galaxy A5 50 Samsung Galaxy A3 2016 80 Samsung Galaxy
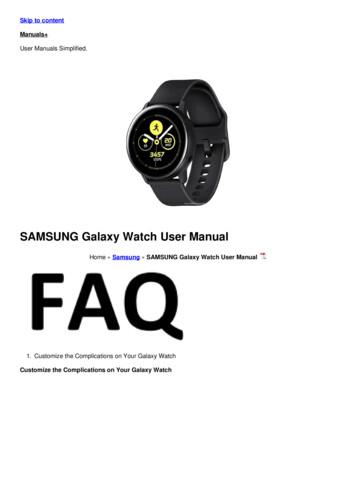
4. Samsung Galaxy Watch Active User Manual Samsung Galaxy Watch Active User Manual - Download [optimized]Samsung Galaxy. 5. Samsung Galaxy Watch Active User Manual Samsung Galaxy Watch Active User Manual - Download [optimized]Samsung Galaxy. 6. SAMSUNG Galaxy Watch Active User Manual Samsung Galaxy Watch Active Quick Start Guide 1 .
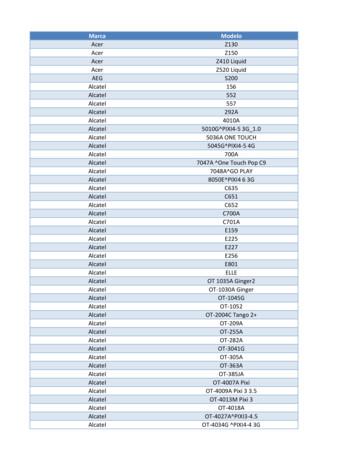
Samsung SGH-D807 Samsung SGH-D900 Samsung SGH-E215L Samsung SGH-E251L Samsung SGH-E256 Samsung SGH-E316 Samsung SGH-E356 Samsung SGH-E376 Samsung SGH-E496 Samsung SGH-E608 Samsung SGH-E630 Samsung SGH-E720 Samsung SGH-E736. Marca Modelo Samsung SGH-E786 Samsung SGH-E906 Samsung SGH-F250L Samsung SGH
Samsung Galaxy Note 10.1 Fast-charge most smartphones & tablets, such as: Nexus 7 Nexus 5 iPhone Samsung Galaxy S 5 Samsung Galaxy Note 10.1 Microsoft Surface Pro 2 Samsung Galaxy Note 4 Microsoft Surface RT Samsung Galaxy S5 Acer Iconia W700P-6821 Samsung Galaxy S4 Windo
Samsung Galaxy S4 Active with LTE Samsung Galaxy Note LTE / Note II LTE / Note 3 LTE Samsung Galaxy ACE 3 LTE Samsung Galaxy Note 10.1 LTE / Note 8.0 with LTE Samsung Galaxy Mega 6.3 with LTE . 5 Samsung Galaxy Tab 3 10.1 LTE / Tab 3 7.0 LTE Sony Xperia V / Z / SP / Z Ultra / Z1
Samsung Galaxy SIII 10.7 hours of talk time Samsung Galaxy S4 12.9 hours of talk time Samsung Galaxy S5 11.5 hours of talk time Samsung Galaxy Note II 4.2 hours of video playing Samsung Galaxy Tab II 2.8 hours of video playing Samsung Galaxy Ta b III 2.4 hours of
User Manuals Simplified. SAMSUNG Galaxy A11 User Guide August 3, 2021September 6, 2022 Leave a comment on SAMSUNG Galaxy A11 User Guide Home » Samsung » SAMSUNG Galaxy A11 User Guide Document Contents hide 1 SAMSUNG Galaxy A11 2 Getting to know your Galaxy A11 3 Phone setup 3.1 Inserting a SIM/microSD card 4 Touch screen 4.1 Personalize
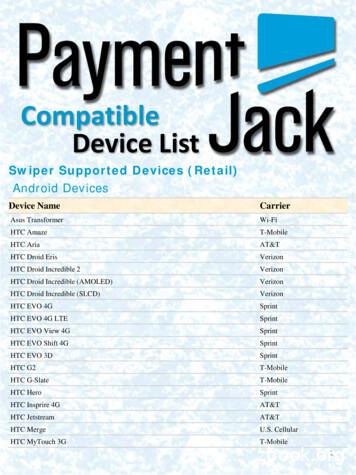
Verizon . Samsung Epic 4G (Galaxy S) Sprint . Samsung Exhibit 2 : T-Mobile . Samsung Exhilarate : AT&T . Samsung Fascinate (Galaxy S) Verizon . Samsung Fascinate (Galaxy S) C-Spire . 3 . 4 . Device Name. Carrier. Samsung Galaxy Note . AT&T . Samsung Galaxy S 2 . U.S. Cellu


