Gold & Aluminum Bonding Wedges Bonding Spectrum
Gold & Aluminum Bonding WedgesBonding Spectrum
Global Vision . Worldwide Network . Local Presence .Pioneer . World Leader .The SPT Roth Group’s strategy centers ondeveloping the Company into an integratedglobal corporation. Over the last twentyyears, we have built on our global visionand invested in building manufacturing andsales facilities strategically around the worldto be close to our customers.The worldwide network combined withexcellent logistic facilities ensures promptand full compliance with customerrequirements including ship-to-stock or justin-time delivery programs. Dedicated andhighly qualified sales and service engineersand application specialists ensure thatcustomers receive professional service andsupport at all times from the design phaseto starting mass production.Small Precision Tools - SPT- is the pioneer and leader ofsemiconductor bonding tools forover three decades.1890ROTH GroupLyss, Switzerland1964Aprova Ltd.Lyss, Switzerland1974Small Precision Tools Inc.California, USA1979SPT Asia Pte Ltd.Singapore1982Moldinject, Perfectamould AG.Lyss, Switzerland1991Small Precision Tools (Phils.) Inc.Manila, Philippines1995Small Precision Tools Co. Ltd.Wuxi, China2001SPT Japan Co.,Ltd.Yokohama, JapanSPT is the only bonding toolmanufacturer internationallyestablished with marketing andproduction centres strategicallypositioned all over the globe, to
Creative Solutions . Research & Development . Customer Partnership .Quality . Product & Service Excellence .Customer partnership is our belief. AtSPT, we listen to our customers. Because,every customer’s needs are different, everysolution is uniquely designed to satisfythose needs in the most effective way.SPT is committed to quality and customercare. Our commitment to product excellenceand continued support of our customers ispart of the sustaining culture of SPT.SPT’s partnership philosophy has earnednumerous prestigious awards andSPT offers a wide range of proactivesupport and services such as consulting,design, analysis, training seminars andbenchmarking partnerships. SPT’s materialand process technology laboratoriesin Switzerland and Singapore offertechnical support and services such timizationPrecisionTechnologyTrainingExcellence
Product Technology . Excellence . Unsurpassed .SPT positions itself as a progressivehigh-technology tool manufacturer usingstate-of-the art processes. Our productioncapabilities range from conventional toCNC machining including milling, turning,surface grinding, honing, Electro-DischargeMachining or EDM, jig grinding and more.Our exclusive Injection Molding technologyof small complex parts through SPT’s ownin-house formulation and sintering assurescustomers of the highest quality in highalumina ceramic and carbide materials.Our equipment and manufacturingtechniques are the most advanced in theultra precision tool industry.We make standard and custom designsfor specific customer requirements. AllBonding CapillaryµBGA Tab ToolFine Pitch Bonding WedgeWaffle Tab ToolDie Attach ColletsBushingsPrecision PartsCIM & MIM PartsWatch Gear
Introduction1Technology OverviewThe WireBondingProcessSmall WireBonding Tools246678242628303234363840424446485052Large Wire Bonding ToolsLarge Wire BondingInline Groove No-hole Bonding Tools. OSG7Inline Groove No-hole Bonding Tools. CKVDInline Groove No-hole Bonding Tools. CKInline Groove Bonding Tools. 45CKInline Groove No-hole Bonding Tools. LWD6Concave No-hole Bonding Tools. 1009AInline Groove Notch Tools. 3016 / 4516Inline Groove Notch Tools. 1015A / 1016A / 2015A / 2016AInline Groove Notch Tools. 30D6 / 45D6 / 60D6Inline Groove Autobonding Tools. AB165456586062Single Point Tab Bonding ToolsSingle Point Tab Bonding ToolsDouble Cross Groove . 7000 / 7100Double Cross Protrusion. 7500 / 7600Waffle Foot. 7045W / 7145WWaffle Foot – Shank Flats. 7045W / 7145W2022Large WireBonding ToolsSingle Point TabBonding ToolsSmall / Large WireShank Styles6465Small / Large Wire Shank StylesSmall Wire Shank Style . V Style / J Style / H Style / P Style /Standard Style / 180Deg-RevLarge Wire Shank StyleTip to Shank Ratios66Tool Selection Guide69Wedges Requirement Checklist63Technology OverviewThe Wedge Bonding ProcessBasic Ultrasonic Wedge Bonding ProcessAvailable MaterialsWire Bonding GuideDestructive bond pull testNon-destructive bond pull testBonding FailuresSmall Wire Bonding ToolsFine Pitch Bonding Tool. FPUniversal Bonding Tool. US / UTChip-On-Board Autobonding Tool. UTAutobonding Tool. ABTMicrowave Bonding Tools. M30A / M45A / M55A / M60A /M30B / M45B / M55B / M60BStandard Notch Bonding Tools. 1001A / 1002A / 1110A /1001B / 1002B / 1110BSlimline Notch Bonding Tools. 1200A / 1300A / 1400A / 1100A /1200B / 1300B / 1400B / 1100BSpecial Bonding Tools. 1008ASpecial Bonding Tools. XGRPF Needles. PF20Ribbon Wire Bonding Tools. RW30 / RW45 / RW55 / RW601012141618IntroductionContentsAll dimensions are in inch/µm unless otherwise stated.We reserve the right to make changes to design or specifications at any time without notice.Ultrasonic wedge bonding (SM & LW wire).The most commonly used method of connecting semiconductor devices to the ‘outside’ world is viagold or aluminum wire, ranging from .0005”/13µm to .003”/76µm for Au wire and .0008”/20µm to.020”/508µm for Al wire. The tip of the wedge vibrates parallel to the bonding wire. The weld is createdby deforming the wire at a low temperature in which the energy for the weld formation is supplied froman ultrasonic transducer vibrating (60 to 120 kHz) the bonding tool or wedge. Aluminum wires areconnected ultrasonically, gold wires using thermosonic welding (combination of heat 150 - 250 C andultrasonic energy).Wedge Bonding is a perennial technology for a niche market. In the early years of semiconductor,wedge bonding is commonly being used as a method of interconnection for Semiconductor Devices,Diode and single Transistor. At present, wedge bonding is popular for COB, Discrete, Hybrid, Hermeticand High Power Devices. With the many benefits that wedge bonding can offer such as deep access,fine pitch, and low and short loops bonding, it became a well known technique that is extensively beingused in microwave and optoelectronics applications.The low temperature wedge bonding is also attractive for some applications like Flex circuits as thishelps prevent the softening of adhesive layers on the flex. Softened flex will absorb more of the ultrasonicenergy during bonding resulting to poor bond reliability.
The ultrasonic bonding process typically started by feeding the wire at an angle usually 30-60 fromthe horizontal bonding surface through a hole in the back of a bonding wedge. Normally, forwardbonding is preferred, i.e. the first bond is made to the die and the second is made to the substrate. Thereason is that it can be far less susceptible to edge shorts between the wire and die. By descendingthe wedge onto the IC bond pad, the wire is pinned against the pad surface and an U/S or T/S bondis performed. Next, the wedge rises and executes a motion to create a desired loop shape. At thesecond bond location, the wedge descends, making a second bond. During the loop formation, themovement of the axis of the bonding wedge feed hole must be aligned with the center line of thefirst bond, so that the wire can be fed freely through the hole in the wedge. Several methods can beused to end the wire after the second bond. For small wires ( .003”/76µm), clamps can be used tobreak the wire while machine bonding force is maintained on the second bond (clamp tear), or theclamps remain stationary and the bonding tool raises off the second bond to tear the wire (table tear).The clamp tear process offers a slightly higher yield and reliability than the table tear process dueto the force maintained on the second bond during the clamp tear motion. The clamp tear processalso offers a slight speed advantage over the table tear process due to fewer required table motions.However, the table tear process, has a higher wire feed angle capability and stationary clamp, hasthe potential to provide slightly more clearance from package obstructions such as a bond shelf orpin grid. For large bonding wires ( .003”/76µm), the most common method is using a cutter blade.Once the wire is terminated, the wedge ascends. The clamped wire is fed under it to begin bondingthe next wire this process will repeat until the wire bond program is complete.Clamp tearTable tearWedge bonding technique can be used for both aluminum wire and gold wire bonding applicationswith some slight modification to the back radius to compensate for the lower tensile strength of goldwire. The principle difference between the two processes is that the aluminum wire is bonded in anultrasonic bonding process at room temperature, whereas gold wire wedge bonding is performedthrough a thermosonic bonding process with heat up to 175 C. A considerable advantage of thewedge bonding is that it can be designed and manufactured to very small dimensions, down to50µm pitch. Aluminum ultrasonic bonding is the most common wedge bonding process becauseof the low cost and can be bonded at room temperature. The main advantage for gold wire wedgebonding is the possibility of avoiding the need for hermetic packaging after bonding due to the inertproperties of the gold. In addition, a wedge bond will give a smaller footprint than a ball bond, whichspecially benefits the microwave devices with small pads that require a gold wire junction down to.0005”/ 13µm.Bonding Wedge ToolsWedge bonding is performed using a wedge-shaped bonding tool. The wire in wedge bonding isaddressed at an angle (30o to 60o) through the rear of the wedge. When special clearance is necessarythe wire will be fed at 90 through a hole in the shank for maximum clearance. Low angle wire feedstyle gives best placement control and tail consistency under the bond foot. High angle wire feed isonly used when absolutely necessary due to high package walls where the bonding to the edge ofthe die is necessary. Tail control and bond placement accuracy is less consistent due to the steepfeed angle which causes the wire tail to contact the pad prematurely causing the wire to shift awayfrom underneath the bonding tip or be pushed back into the feed hole. Unlike at lower feed angles(30 to 45 ) the wire is in line with the tip. Foot profile of the wedge can be either flat or concave.Most of the automatic aluminum wire applications use the concave foot to reduce wire positioningerrors. The flat foot is used mainly with gold wire or with aluminum wire to obtain extremely shortbonds. A groove foot has been designed for gold wire wedge bonding to improve the wedge-to-wiregripping. The material used for the wedge is dependent on the bonding wire material. For aluminumwire, the wedge is made of tungsten carbide. For gold wire, the material used is titanium carbideor cermet tip. The cermet tip wedge is most commonly used in applications where low temperatureAu to Au bonding is required.The parameters of the wedge can greatly affect the wire-bond characteristics. For the first bond, pullstrength is affected by back radius (BR), bond location is influenced by hole size (H) and tail lengthis controlled by feed angle, hole shape and surface quality. The main wedge parameters that affectlooping are hole size and shape, as well as feed angle. For the second bond, pull strength is definedmainly by front radius (FR), bond length and tail consistency is affected by back radius (BR).Bond FlatBF1st BondBond Flat2nd Bond BFFlat Lengthof BondFlat Lengthof Bond FootWedge for Al wire wedgebondingGuillotine termination methodsWedge for Au wedgebonding.M45B-1507-L-FM.0007”/18µm wireAnother major feature of ultrasonic wedges is the Bond Flat (BF). The Bond Flat is defined as thelength of the bonding tool foot that appears flat when measuring with a microscope at 300X will givea very close approximation to the actual bond length achieved during the bond process. The Wedge BondingProcessBasic Ultrasonic Wedge Bonding Process
Tungsten Carbide (W) is widely used because of its extraordinary properties and is particularlysuited for a variety of wear resistant tools.Tungsten Carbide is the most commonly used materialfor Aluminum wire and ribbon bonding. Our premium grade Tungsten Carbide provides efficientultrasonic energy transfer due to its uniform, high density, fine grain structure.Microloy (M) is the material of choice for all types of difficult to bond applications. This materialhas the coupling advantages of Cermet with the added advantages of reduced build-up andit can be used with Aluminum, Gold and Platinum wire and ribbon. Microloy can be used tobond any type of bondable wire to any type of bondable substrate or die. This unique materialis only available from SPT and its applications and advantages include:Longer tool lifeTypically,customers find the tool life several times longer because of wear-resistantosmium alloy at the tip of our tools. The consistency of Microloy makes the tool lifetimepredictable and stable for a given application.“Low stress” bondingBecause of the excellent ultrasonic coupling, many users of Microloy tools find that theycan bond with less power, force, time and/or temperature, including room temperaturebonding of gold wire at 60k Hz.SPT premium grade fine grainTungsten Carbide MaterialTungsten Carbide from another supplierTitanium Carbide (TI) ) is the typical choice for gold wire and ribbon bonding applications.Titanium Carbide is a sintered alloy of Titanium and various binders. Our material is anindustry recognized standard for gold wedge bonding. SPT supplies high quality Ti Carbidetools for standard bonding applications and fine pitch wedge and ribbon bond tools with highstructural integrity.Cermet (C) is an optional material for gold wire, ribbon and TAB applications at lower bondingtemperatures. The naturally coarse texture of our ceramic-metal alloy “Cermet” provides enhancedultrasonic coupling, allowing reduced bonding parameters, gentler touchdown and extendedtool life. All Cermet bonding tools are manufactured using a two piece construction. SPT’sproprietary brazing technique creates a uniform, ultra thin brazed joint with our Tungsten Carbideshank, allowing seamless ultrasonic transfer equivalent to a unibody carbide wedge.Microloy (M) is the latest addition to the SPT bonding tool product line. In the 1970’s,Microminiature Technology, Inc. discovered that an Osmium (Os) based carbide alloy had aset of properties that made it an ideal material for the tips of bonding tools used in ultrasonicwire, ribbon and TAB bonding. Its wear-resistance and unique surface finishes allow forunparalleled ultrasonic coupling. The alloy was given the name “Microloy”, and its criticalproperties include:Higher reliability bondsThe unique finishes possible with Microloy enhance the transmission of ultrasonicenergy and improve the quality of the bond, especially with gold interconnects.Fine pitch Bonding WedgesThe Microloy bonding tools are being used in a 35 micron pitch bonding process.Microloy’s properties plus our state-of-the-art manufacturing expertise allow a unique bondingsurface finish for efficient ultrasonic coupling, with minimal build-up for longer tool life.Wedge Bonding Tool Surface High and consistent pull strength. High density. Reduced bond power, force and time. High elastic modulus. Less deformation of bond. Extreme hardness. Eliminate cross-grooves. Excellent wear resistance. Fine grain structure. Low porosity. Matte “M”Frost “F” The Wedge BondingProcessAvailable Materials
Process Development and Optimization:The failure during pull test may occur at one of the five positions in the wire-bond structure:The key stages generally include initial process design and development, process characterization,process control and process optimization. These stages form a continuous loop betweencharacterization and control with periodic optimization and development.A. Lift off first bondIn the initial stages of the process, process capabilities should be known to set achievablegoals. The second stage (process characterization) is to collect and categorize the data onwire-bonding failures such as bond off center, bond not sticking on die, wire breaking and soon. Process control (the third stage) is important for a successful process. To achieve a stableperformance, the operating variables such as bond program parameters, machine setup,operation procedures, bonding tool installation, wire pull procedures and product change mustbe minimized and consistent across the process, such as in the training of operators must beestablished. If the previous stages of process development are in place, process optimizationcan be performed. Once a process is operating in a production environment, statistical processcontrol (SPC) can be applied to such items as destructive wire pull and non-destructive wirepull (commonly used in military products and large wire-bonding applications) to monitor theprocess and to minimize process drift.Bond Evaluation:After bonding, the wire-bond can be evaluated with visual and mechanical testing. Dependingon the customer requirements, the following are the three most common mechanical testingmethods that are employed for the evaluation of bond strength.B. Wire break at transition first bondC. Wire break mid spanD. Wire break at transition second bondE. Lift off second bondWhen the process is in control, the bond should fail at B or D. If failures occur at A, C, or E, thenthe bonding parameters, metallization, bonding machine, bonding tool, bonding wire and wire pullhook all have to be reviewed.Non-Destructive Bond Pull Test:This test is a variation of the destructive pull test in that the maximum force applied to the bondloop is limited to a predetermined value. It is usually used to detect unacceptable wire-bonds whileavoiding damage to acceptable wire-bonds. The most common failures are bond lifts, tight wires,heel cracks and cratering. The non-destructive pull test force is specified for a given wire diameterand metallurgy.1. Destructive bond pull test2. Non-destructive bond pull test (most commonly used in military and automotive products)3. Bond shear test (commonly used in wire dia. .004”/100µm)Destructive Bond Pull Test:Destructive pull test, i.e. bond pull strength test, is the primary method to evaluate thebond strength by hooking and pulling the bonded wire until failure occurs. The purposeof this test is to examine the bond strength and to certify the proper setup of the bondingmachine parameters. The results are important evidences for evaluating bonding qualityand reliability. The same results evaluate the understanding of bond failure mechanismsincluding bond pad cratering, over-bonding and shear fatigue at bonded interfaces duringtemperature cycling. Pull strength is strongly dependent upon the geometrical configurationof the pull test.Schematic of non-destructive pull testFailure Mechanisms of Wire-Bonds:A major advantage of wire-bonding for microelectronic interconnection is its solid base of reliabilityfrom bond strength studies to time and temperature design factors. Many factors may degrade yieldand reliability of the wire-bonds. Trouble shooting can be carried out using a “fishbone diagram”to isolate the errors in wire-bonding process. It is then possible to focus problem-solving effort onfewer aspects of the process.Schematic of destructive pull test The Wedge BondingProcessWire-Bonding Guideline
Bonding FailuresCratering, typically occurring in ultrasonic bonding, is defined as damage to the semiconductor glassor other layers that lie under the bonding pad metallization. The damage may be in the form of arecognizable divot but more commonly takes the form of invisible structural damage. This damagecan degrade the device characteristics and is often taken for electrical damage. Main causes ofcratering are often targeted to the tool design but in most cases is related to the following: High ultrasonic energy can cause stacking faults to occur in the silicon lattice. Too low bond force can induce cratering in wedge bonds causing the tool to bounce/vibrate whenthe power and time is applied. Excessive tool-to-substrate impact velocity does not induce cratering in silicon but does onweaker crystals such as gallium arsenide. Too short of a tail can make the face of the bonding tool contact the metallization. Heavy probing may lead to chip damage under the influence of the applied ultrasonics. Best bonds are made when the pad and wire hardness match which is the optimum conditionfor minimum cratering. Harder wire can cause silicon craters during aluminum ultrasonic bonding.SEM of Bond with Cracked HeelCBR Wedge ProfileHeel Crack & CBR Wedge ProfileInconsistent Tails:This is the most common problem encountered in wedge bonding and one of the most difficult tocure as it can be caused by any of the following: Dirty wire path Incorrect wire feed angle Partially blocked wedge Dirty wire clamps Incorrect clamp gap Incorrect clamp force Faulty feed/tear mechanism Incorrect wire tension Incorrect radii (to large)Too short a tail means that the force on the resulting first bond is distributed over a much smallerarea leading to excessive deformation. Too long a tail may lead to shorting between pads.CrateringWire-bond fracture and lift-off:The heel of the bond is already overworked (weakened) during ultrasonic welding and flexing forwardand backward is often sufficient to form a crack. Metallurgical crack formation is a critical issuefor wire-bonding process. The crack often forms in the heel of the first bond of aluminum wedgebonding. The following reasons can cause heel cracks: Using a sharp heeled bonding tool. Operator motion of the pedestal (if a manual bonder is used). Excessive bond deformation. Rapid-tool movement after first bond.High loops can lead to greater tool motion and an increased probability of heel cracking. The crackscan be enhanced when the second bond is significantly lower than the first, typical of reverse bondingsince the wire is bend backwards more than if bonds are on the same level. Heel cracking can reducepull strengths by up to 40% and can also lead to premature cycling failures. An enhancement featurethat can be added to the Back Radius to minimize heel cracks is the Chamfered Back Radius (CBR),a common design feature recommended only when heel cracks are a problem. Overcompensationin the removal or prevention of heel cracks may cause inconsistencies in wire termination whichcan result in ‘missing wire’ and inconsistent tail length problems. The Wedge BondingProcessCratering of a Wire-Bond Pad:
FP SERIES - FINE PITCH BONDING TOOLFP SERIES - GENERAL GUIDELINES ON HOW TO ORDERThere are a number of technical challenges unique to fine pitch wire-bond process. It includes a broad mixof component technologies. A typical package may contain 200 different components ranging in size from(.008 inch X .008 inch) and .004 inches thick to (.500 inch X .500 inch). The sheer number of different sizedchips and tight chip-to-chip spacing create problems in accessing the bond pads. Fine pitch wire-bondingis of particular importance in the manufacturing of these devices. Fine pitch is defined as 100 microns orless center-to-center distances between bond pads. Many devices use the latest high performance chipsthat typically include 4 mil pitch bond pads. Innovations in tool configurations, machine vision systems andwire-bonding ultrasonics have been critical to improved fine pitch wedge bondingFP Fine Pitch Standard Design30 , 38 , 45 , 55 , 60 Wire MaterialWire DiameterHole SizeFR .0001/3BR .0001/3ØH45 FEED ANGLERADIUSSET30 20 STYLEAAluminum / Gold.0010 / 25 - .0015 / 38.0015 / 38 - .0030 / 76.0010 / 25.0010 / 25BGold.0010 / 25 - .0015 / 38.0015 / 38 - .0030 / 76.0010 / 25.0006 / 15BAluminum.0007 / 18 - .0010 / 25.0015 / 38 - .0020 / 51.0010 / 25.0006 / 15CGold.0005 / 13 - .0010 / 25.0015 / 38 - .0020 / 51.0004 / 10.0004 / 10FRW20 10 BRBFTFRBRBFTVertical Relief “VR”supplied as neededdepending on BondPad PitchHOLE / BOND FLATMaterial55 , 60 30 , 38 , 45 VRCermet composite for GoldWire (recommended for LowTemperature bonding)Will rely on specific applicationrequirements (wire diameter used,bond pad size) – see dimension TableMMicroloy (Osmium-CarbideAlloy) for Gold & AluminumWire* For Oval Hole options please specifyHH (Hole Height) & HW (Hole Width)TITitanium CarbideComposite for Gold WireWTungsten Carbide Ultra FineGrain for Aluminum WireCTool LENGTH (TL)S .437 / 11.1 mm¾ .750 / 19.05 mmL .828 / 21.0 mm1.00 1.00 / 25.4 mmLonger lengths are availableconsult Bonder manufacturer forspecifications.STANDARD DIMENSIONSToolStylesWireFeedAngleFP3030 FP3838 FP4545 FP5555 FP6060 Tip Thickness Tip Thickness Tip ThicknessT 30 T 38 /45 T 55 /60 in / µmin / µmin / µm .0005/13 .0005/13 .0005/13Hole /BondFlatHoleHin / µm .00015/3.8Bond FlatBFin / µm .00015/3.8Foot WidthWin / µm .0002/51507.0015 / 38.0007 / 18.0030 / 76.0140 / 356.0140 / 356.0120 / 3051510.0015 / 38.0010 / 25.0030 / 76.0140 / 356.0140 / 356.0120 / 3051515.0015 / 38.0015 / 38.0030 / 76.0140 / 356.0140 / 356.0120 / 3051520.0015 / 38.0020 / 51.0030 / 76.0140 / 356.0140 / 356.0120 / 3052010.0020 / 51.0010 / 25.0030 / 76.0150 / 381.0140 / 356.0120 / 3052015.0020 / 51.0015 / 38.0030 / 76.0150 / 381.0140 / 356.0120 / 3052020.0020 / 51.0020 / 51.0030 / 76.0150 / 381.0140 / 356.0120 / 3052025.0020 / 51.0025 / 64.0030 / 76.0190 / 483.0140 / 356.0120 / 3052520.0025 / 64.0020 / 51.0040 / 102.0190 / 483.0140 / 356.0140 / 3562525.0025 / 64.0025 / 64.0040 / 102.0190 / 483.0140 / 356.0140 / 3562530.0025 / 64.0030 / 76.0040 / 102.0190 / 483.0140 / 356.0140 / 3563025.0030 / 76.0025 / 64.0040 / 102.0200 / 508.0190 / 483.0170 / 4323030.0030 / 76.0030 / 76.0040 / 102.0200 / 508.0190 / 483.0170 / 4323035.0030 / 76.0035 / 89.0040 / 102.0200 / 508.0190 / 483.0170 / 432UseableWire Diameterin / µmVR Set “A” 70µm to 80µm BPPW .0030”, VW .0040”, VR .0060”VR Set “B” 60µm to 70µm BPPW .0025”, VW .0030”, VR .0060”WDVRVR Set “C” 50µm to 60µm BPPW .0020”, VW .0025”, VR .0060”Max HW .0015”, for WD .0010” or lessOval Hole.0005 / 13through.0008 / 20.0008 / 20through.0010 / 25FOOT OPTIONSCConcave foot design with polished FR and BR with fine matte finish on BF (matte most commonly usedwith Aluminum wire) for best results specify when the BF is greater than .0015”/38µm.CMConcave foot design with FR, BR and BF matte (for Aluminum and Gold wire)Flat (Optional)FMFlat foot design FR, BR and BF are matte (for Gold Wire) or wire diameter less than.0013”/33µm and BF is less than .0015”/38µmCGMCross Groove with FR and BR matte (for Gold Wire) with a matte Flat BF. Most commonly used onmanual and semi automatic bonders where pad size restrictions is not an issue. Not recommended for BFsmaller than .0020”/50µmCCMCross Groove with FR and BR matte (for Gold Wire) with a matte Concave BF. Most commonly used onautomatic bonders where wire control is critical and pad size is limited. Not recommended for BF smallerthan .0020”/50µm.0010 / 25through.0013 / 33.0015 / 38through.0020 / 51HOW TO ORDERSPECIFYStyle/Radius Set – Material – Hole/Bond Flat – Tool Length – Foot Option(For Fine Pitch application below 80µm BPP, refer to page 8 for VR sets to specify, otherwise specifyVR and VW) or contact our technical support staff for assistance with your requirements. For SpecialShank Style refer to page 61.EXAMPLEFP45A - W - 2020 - L - CM180 - DEG - REVFP38B - TI - 1515 - ¾ - FMVR Set BFP60B - C - 2025 - L - CGMVR Set AFP55B-TI-1520-3/4-CGMHH .0020 HW .0015 VR Set CWVW1011Small WireBonding ToolsØH
US/UT SERIES - UNIVERSAL BONDING TOOLBA20 FAØHSTYLEHAWFRBFWireFeedAngleTUT has a 10 BAUS has a Slimline(0 ) BAUT30AUS30AUT38A30 38 US38AUT30CUS30C30 UT38CUS38C38 UT45AUS45AUT45CUS45C45 45 12HoleHin / µm .0002/52020.0020 / 51.0020 / 51.0040 / 102.0150 / 3812025.0020 / 51.0025 / 64.0040 / 102.0150 / 381.0010 / 25through2520.0025 / 64.0020 / 51.0040 / 102.0150 / 381.0013 / 332525.0025 / 64.0025 / 64.0040 / 102.0150 / 3813020.0030 / 76.0020 / 51.0050 / 127.0200 / 5083025.0030 / 76.0025 / 64.0050 / 127.0200 / 5083030.0030 / 76.0030 / 76.0050 / 127.0200 / 5083035.0030 / 76.0035 / 89.0050 / 127.0200 / 5083530.0035 / 89.0030 / 76.0060 / 152.0250 / 6353535.0035 / 89.0035 / 89.0060 / 152.0250 / 6353540.0035 / 89.0040 / 102.0060 / 152.0250 / 6354540.0045 / 114.0040 / 102.0085 / 216.0350 / 8894545.0045 / 114.0045 / 114.0085 / 216.0350 / 8894550.0045 / 114.0050 / 127.0085 / 216.0350 / 8892020.0020 / 51.0020 / 51.0040 / 102.0140 / 3562025.0020 / 51.0025 / 64.0040 / 102.0140 / 3562030.0020 / 51.0030 / 76.0040 / 102.0140 / 3562020.0020 / 51.0020 / 51.0040 / 102.0140 / 3562025.0020 / 51.0025 / 64.0040 / 102.0140 / 3562520.0025 / 64.0020 / 51.0040 / 102.0140 / 3562525.0025 / 64.0025 / 64.0040 / 102.0140 / 3563020.0030 / 76.0020 / 51.0050 / 127.0180 / 4573025.0030 / 76.0025 / 64.0050 / 127.0180 / 4573030.0030 / 76.0030 / 76.0050 / 127.0180 / 4573035.0030 / 76.0035 / 89.0050 / 127.0180 / 4573530.0035 / 89.0030 / 76.0060 / 152.0200 / 5083535.0035 / 89.0035 / 89.0060 / 152.0200 / 508354
Guillotine termination methods Table tear The ultrasonic bonding process typically started by feeding the wire at an angle usually 30-60 from the horizontal bonding surface through a hole in the back of a bonding wedge. Normally, forward bonding is preferred, i.e. the first bond is mad
1. Heat oven to 425 F. Spray large cookie sheet with cooking spray. Bake potato wedges on cookie sheet as directed on bag, stirring halfway through. 2. Meanwhile, heat stew as directed on pouch. Mound baked potato wedges in 10-inch ovenproof skillet. Sprinkle 1 cup of the Cheddar cheese over wedges. Pour stew over cheese and wedges.
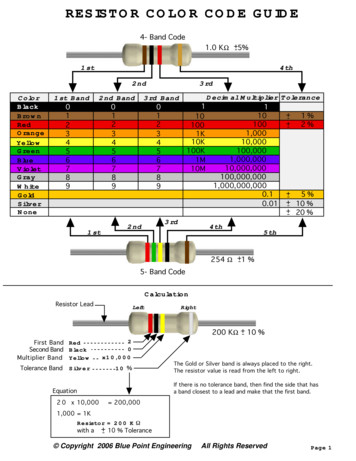
.56 ohm R56 Green Blue Silver.68 ohm R68 Blue Gray Silver.82 ohm R82 Gray Red Silver 1.0 ohm 1R0 Brown Black Gold 1.1 ohm 1R1 Brown Brown Gold 1.5 ohm 1R5 Brown Green Gold 1.8 ohm 1R8 Gray Gold 2.2 ohm 2R2 Red Red Gold 2.7 ohm 2R7 Red Purple Gold 3.3 ohm 3R3 Orange Orange Gold 3.9 ohm 3R9 Orange White Gold 4.7 ohm 4R7 Yellow Purple Gold 5.6 ohm 5R6 Green Blue Gold 6.8 ohm 6R8 Blue Gray Gold 8 .
Gold 6230 2.1 20 27.5 10.4 Y 125 Gold 6226 2.7 12 19.25 10.4 Y 125 Gold 6152 2.1 22 30 10.4 Y 140 Gold 6140 2.3 18 25 10.4 Y 140 Gold 6130 2.1 16 22 10.4 Y 125 Gold 5220 2.2 18 24.75 10.4 Y 125 Gold 5218R 2.1 20 27.5 10.4 Y 125 Gold 5218 2.3 16 22 10.4 Y 105 Gold 5217 3 8 11 10.4 Y 115 Gold 5215 2.5 10 13.75 10.4 Y 85 Gold 5120 2.2 14 19 10.4 Y .
Aluminum Sheet Aluminum Plate Aluminum Round Bar Aluminum Square Bar Aluminum Flat Bar Aluminum Angle Aluminum Structural Channel Aluminum Safety Grip Channel . peeled or smooth turned. Available in a wide selection of lengths and grades. 316/316LAvailable in pump shaft quality. Size
Aluminum Association's Task Group on Visual Quality Attributes of Aluminum Sheet and Plate. ALUMINUM ASSOCIATION SHEET AND PLATE DIVISION COMPANIES Alcan Inc. Alcoa, Inc. ARCO Aluminum Inc. Coastal Aluminum Rolling Mills, Inc. Corus Aluminium Rolled Products Jupiter Aluminum Corporation Kaiser Aluminum & Chemical Corporation Spectrulite .
the gold bonding wire and gold board metallization. Power and time relate to the ultrasonic generator settings used to “ultrasonically soften,” the bonding wire. Tool force is the amount of weight applied to the bonding wire to mechanically couple the bonding wire to the bonding pad surface. D
Wire bonding was conducted on a gold ball bonder at a bonding temperature of about 155-160 C on the PCB surface using 25um 4N gold wire. The bonding tool used for the wire bonding process was for off-the-shelf 80um pitch applications with capillary tip dimensions of about 100um. Wire pull tests were
Edexcel IGCSE Accounting Pg 10 1.3 The accounting equation learn a simple Statement oflist examples of Refer to Sec Syllabus assets and Financial Position(horizontal/T The Principles of liabilities style) which explains the basic Double-Entry accounting equationclassification of . items as assets calculate the value of assets, Go For Accounting Pg and liabilities liabilities and capital using .


