Documentation - North Dakota State University
https://upverter.com/documentation
Why use Upverter? In the near future you may or may not be using Upverter. There are many PCB generating programs available. It all depends on the application. For Schematic Design and PCB Design, you may choose Multi‐Sim (very good program and is heavily used by Engineers, It is also not free and has a large learning curve. Digi‐key has pcbartist, there is ki‐cad, design‐spark and many more. Upverter.com was chosen as it is web‐based, its free, and has an easier learning curve than others, plus it has a collaboration option that works quite well when you team‐up on a project.
UPVERTER Power Point to aid in the creation of a PCB Slides 1‐5 Upverter Information Slides 6‐18 Create the Schematic Slides 19‐40 Create the PCB Slides 41‐50 Create the Gerber’s Slides 51‐53 On line Gerber‐Viewer Slides 54‐58 Order Procedures from Osh Park ECE401
Upverter is web based go to upverter.com, and Sign up. Username is email, password and then maybe collaborate after you pick a partner Create your own account, password protected Collaboration is possible. This makes it easy to work on a project together Some problems‐ it is web based‐ Upverter does not like Internet Explorer, works ok with Mozilla, but seems to work best with Google Chrome Also you can collaborate with different log‐ins but you cannot be logged in to two different computers at the same time with the same log‐in ID and password.( It doesn’t like collaborating with itself).
https://www.youtube.com/watch?v QZbE‐ gGRtD4 This was very useful website for getting started There is a Part 1 for making the schematic and Part 2 for making the PCB
After an account has been created, this is what you will see.
After going to Upverter.com and creating an account Create a New Project Create a New project Project New
Adding Parts to the schematic. Verified vs. Generic
I started with a Microcontroller‐ using the Arduino ATmega328‐PU IC, which is a 28 Pin DIP Package IC
The check mark says it is a Verified part. This is required to transfer to the PCB Design Start with micro controller
Add some components, such as LED’s and current limiting resistors
Insert a battery, in this case BT1, change the 3.3 Volt to 9V
Add your grounds
You will need Data sheets handy, indicating Pin Lay outs, for Vcc Gnds, Input and output pins
Insert a Voltage Regulator such as an LM7805 5 Volt Regulator
The Connections between components, grounds, power ,etc. are called Nets If highlighted in Yellow there is an issue and must be corrected. Usually a naming issue.
As you can tell, this schematic is different. This is a schematic of a 555 timer that blinks an LED, after schematic is finished, the next step is to create the PCB. Press “Q” to jump back and forth from Schematic to PCB
In Creating a Schematic you need to use Verified parts, If on the schematic there is no checkmark, the parts will not transfer over to the Bill of Materials list of the PCB Editor when installing a part, press “Q” and it will tab between schematic and PCB
Remember only the Verified parts will work in creating a PCB
Reminder of all the tutorials available on line and on YouTube
https://www.youtube.com/watch?v E44qD H6Ftw Go to this tutorial to see how to change your schematic into a pcb.
When creating schematic, do you have any issues like this? (Highlighted in Gold?)
Nets have to be named. Double click on the gold, this box shows up, and name your NET
Gold outline is now gone and circuit is finished‐ time to convert the Schematic into a CAM File
Click PCB Layout. This should show up. The VERIFIED Parts and the NETS (These are connections made in the schematic and altogether is called the Rats nest.
First step in creating a PCB Is the dimension of the PCB, Double click anywhere on the canvas and this shows up.
After filling in dimensions, in this case changing mm to mils, and typing in 2000mils x 2000mils, we create a pcb of 2” x2”
Go to the Layers tab on the right hand side, scroll down to Mechanical Layer and shut OFF, the square goes away, highlight all the visual components and move down slightly so the ORIGIN cross sits slight above all the visualized components
After moving all components out of the way, and turning the Mechanical Layer back on
If this is what is shown the first step in PCB Fab is comple te. Now highlig ht your parts and insert them in the box.
Always start with your main componen ts and add the rest in accordanc e with your schematic.
Move components around in straight lines, this also organizes the pcb, so it resembles the layout of the schematic.
Next step is to determine the width of the trace you want to use and start adding traces, power and ground need wider traces than signal and control traces Try 20mil
After adding all the traces (remember 1 and 2) changes from top to bottom layers. Add some text.
Add whatever is required for text
Using the Pour tool start at the ORIGIN and highlight the outside edge start bottom left/ go up/ to the right/ down/ then start to the left and stop‐ hit escape. No need to go all the way around 360 degrees. This should show up.
Press 2 ‐this will be the bottom layer and then using the pour tool start at ORIGIN , highlight the box and hit escape. This will show up.
Add VIAS to connect the top and bottom layers together if required
PC Board is now done
Once finished , you will need to create the Gerber files which are then exported to companies that make PCB’s, such as Advanced Circuits, or in our case we will use OSH Park.com. Upverter to Gerber files exported. Go to dashboard and press ‐‐‐‐‐‐‐‐‐ Project ‐‐‐‐‐‐‐‐ Export Files Once seeing this image of your schematic, scrolling down you will see . Your schematic . Scrolling further
Bill of materials‐ IF you used verified components‐ Generics won’t show up Bill of materials . Scrolling further .
Scrolling down you will see this they are to export all files, such as Schematic in PDF format, or Bill of Materials Export files Gerber files are also saved along with NC Drill files, which are then zipped and sent to . A Gerberviewer.com For checking
You may download your schematic as a pdf
Or as a .png file . Which is a Higher resolution Schematic image.
Download the projects bill of materials as an Excel spreadsheet convert to pdf etc.
To generate Gerber files – use the Gerber Format (RS‐274X extended) read directions if required
It will automatically download these files, which contain all gerbers as well as xln drill files
It also will compress the files automatically , which are needed to check them for accuracy . Send the zipped files to gerberviewer.com .
This is one of the layers that was downloaded from Upverter files
Shows full PCB with Traces If you like what you see, your PCB files are ready to order . Go to .
JE1 After looking at your files using the gerber‐viewer.com website or similar, they need to be OK’d by Dr. Maassel or the TA or myself to make sure that all is ok for ordering. These next slides show how to order with OshPark.com , It works well as you will see an instant picture of what your actually creating.
Slide 55 JE1 After looking at your files in the Jeffrey Erickson, 1/30/2018
To Order: Go to oshpark.com create an account, Name and email address, DO NOT Pay for anything!
You will see this , it gives information about your board. IF this shows up and are agreeable with the price, scroll down and press Continue
Now you can VERIFY all details of your board. Do not purchase/ files are emailed to Purchase – Jeffrey.Erickson@ndsu.edu
This is the final‐ but DO NOT ORDER unless it is for yourself‐ send the files to Jeffrey.Erickson@ndsu.edu
Power Point to aid in the creation of a PCB Slides 1‐5 Upverter Information Slides 6‐18 Create the Schematic Slides 19‐40 Create the PCB Slides 41‐50 Create the Gerber's Slides 51‐53 On line Gerber‐Viewer Slides 54‐58 Order Procedures from Osh Park ECE401
The North Dakota State Engineer and the North Dakota State Geologist were instructed by the 52nd State Legislative Assembly to conduct site-suitability reviews of the solid waste landfills in the state of North Dakota. These reviews are to be completed by July 1, 1995 (North Dakota Centur
by March 1887. Sioux Falls was home to both the conference office and the Tract Society (renamed the Book and Bible House in 1924).10 South Dakota Conference (1889-1895) From 1889, when the Dakota Territory became the States of North and South Dakota, until 1895, the Dakota Conference was known as the South Dakota Conference.
Oct 05, 2009 · North Dakota Fishing Waters (not including the Missouri River System) The following includes most of the public fishing waters in North Dakota, listed alphabetically by county. If unsure of the location of a county or the code number, refer to the map on pages 50 and 51 which lists
North Dakota Medicaid Expansion 1915i Tool kit The North Dakota Medicaid 1915(i) State Plan Amendment allows North Dakota Medicaid to pay for additional home and community-based services to support individuals with behavioral health conditions. Find what you need for these services for North Dakota Medicaid Expansion members in
Synfuels Plant to develop a world-class clean hydrogen hub in North Dakota is of historical significance for our state and nation and heralds the extension of North Dakota being home to innovative leadership in fueling and feeding the world." Governor Burgum further said, "The North Dakota Hydrogen Hub will lead to the establishment of new
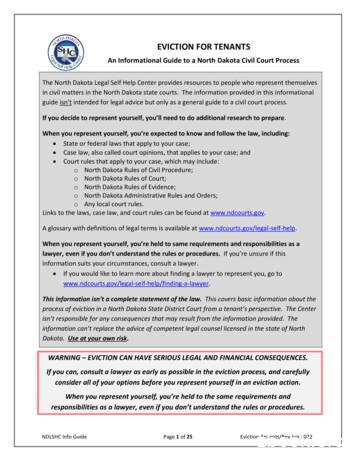
NDLSHC Info Guide Page 1 of 25 Eviction-Tenants/Rev Aug 2021 . EVICTION FOR TENANTS . An Informational Guide to a North Dakota Civil Court Process . The North Dakota Legal Self Help Center provides resources to people who represent themselves in civil matters in the North Dakota state courts. The information provided in this informational
or M vehicle with an operator's license from another state for a period of 60 days after you become a resident of North Dakota. Then you are required to take the necessary tests to ob-tain a North Dakota operator's license. Class A, B, or C vehicle operators have 30 days in which to acquire a North Dakota Commercial Drivers License.
GENERAL INFORMATION . FOR PROVIDERS. NORTH DAKOTA MEDICAID . AND OTHER MEDICAL ASSISTANCE PROGRAMS . Published by: Medical Services Division . North Dakota Department of Human Services . 600 E. Boulevard Avenue, Dept. 325 . Bismarck, North Dakota 58505 . January 2021


