SPECIAL SPECIFICATION Thermal Integrity Profiler (TIP .
October 2017SAMPLE SPECIFICATION FOR TESTING FOUNDATIONSWith the Thermal Integrity Profiling Wire Cable SystemNote: This sample specification contains recommended or typical quantities in parenthesis, inthe format (quantity); the Specifying Engineers can modify these quantities to their specificconstruction project requirements. Contractual items are minimized since each agency has itsown preferences and procedures.SPECIAL SPECIFICATIONThermal Integrity Profiler (TIP) Wire Cable Testing of Drilled Shafts1. DESCRIPTIONNondestructive Testing (NDT) shall be performed using the Thermal Integrity Profiler WireCable methodology, or equal, to provide analytical data for the entire shaft (cage and cover)radius.The Thermal Integrity Profiler (TIP) method uses the heat generated by curing cement (hydrationenergy) to assess the integrity or quality of Cast-in-Place concrete foundations such as DrilledShafts, Bored Piles, Micropiles, Augered Cast-in-Place Piles, Continuous Flight Auger Piles, andDrilled Displacement Piles, herein referred to as “Shafts”. The expected temperature at anylocation is dependent on the shaft diameter, mix design, time of measurement, and distance to thecenter of the shaft. TIP measurements may be used to estimate the actual shape of the shaft.These estimates may be compared with concreting logs to assess the overall quality of the shaft.Because the method relies on the heat of hydration, TIP testing is general done between 8 and 48hours of concrete placement (note the optimum TIP testing time is dependent on shaft size andconcrete mix and could range from 4 to 72 hours). Smaller shafts are typically tested earlier.Good communication between Contractor and TIP Consultant is therefore essential. Data isacquired via the Thermal Wire Cables which are vertically zip tied to the rebar cage or centerreinforcing bars prior to the concreting process.TIP measurements that are cooler than normal indicate inclusions, necks, or poor qualityconcrete; while warmer than normal measurements are indicative of bulges outside of the cagediameter. Variations in temperature between diagonally opposite pairs of Thermal Wire Cablesreveal cage eccentricities, such as cage misalignment.2. EQUIPMENT, PERSONNEL & CONTRACTOR ASSISTANCEThe qualifications of the Consultant and the specifications for the equipment shall be submittedto the Engineer for approval prior to shaft installation.
October 20172.1 EquipmentA Thermal Integrity Profiler (TIP), as manufactured by Pile Dynamics, Inc. (30725 AuroraRoad, Cleveland, Ohio 44139, (216) 831-6131; www.pile.com) shall be provided.The Equipment shall have the following minimum requirements:(1) A computer based TIP Data Acquisition System to monitor and download temperature versustime after casting.(2) Ability to automatically collect data at user defined time intervals (typically 15 minutes).2.2 Qualifications of TIP ConsultantThe TIP Consultant shall have a licensed professional Engineer supervising the testing andinterpretation of results. The TIP Consultant shall be an independent testing agency withdocumented and approved experience in TIP testing.2.3 Assistance by the Shaft Contractor to the TIP Testing Consultant.The Contractor shall provide cooperative assistance, suitable access to the site and shafts to betested, and labor as required to assist the TIP Consultant in performing the required tests. TheContractor shall coordinate with TIP Consultant and install the necessary TIP instrumentationprior to concreting the shaft. Thermal Wire Cable installation requirements are detailedelsewhere in this specification. Prior to TIP testing, the Contractor shall provide the shaftlengths, wire positions, the shaft construction date, shaft construction inspection record, andconcrete placement details to the TIP Consultant.2.4 Thermal Wire Cable Installation Contractor Requirements.The Contractor responsible for installing the Thermal Wire Cable assemblies shall be required toobtain training from the Manufacturer on proper installation practices prior to actual installation.3. TESTING PROCEDURETesting procedures and equipment shall conform to ASTM D7949 – “Standard Test Methods forThermal Integrity Profiling of Concrete Deep Foundations”.
October 20173.1 Shaft Preparation for Thermal Wire CablesInstall (number, typically a minimum of four) evenly spaced Thermal Wire Cables in each( m, ft.) diameter shaft.(Note: The actual number of Thermal Wire Cables installed is typically designed as one ThermalWire Cable for every 0.25m to 0.35m (10 inches to 14 inches) of shaft diameter, with a minimumof four Thermal Wire Cables. Shafts with different diameters at the same site may require adifferent number of Thermal Wire Cables.The preferred even number of Thermal Wire Cables allows for direct comparison oftemperatures on diagonally opposite cables to evaluate cage eccentricity.)Each shaft shall be equipped with Thermal Wire Cables to permit integrity evaluation by TIP.The number of shafts to be tested by TIP is (number) or (percentage of all shafts). Since theactual cost of the Thermal Wire Cables and data collection is very low compared to cost of theshaft, installing cables and collection data for all shafts is highly recommended. The shafts to betested shall be chosen after installation by the Engineer.3.2 TIP ProcedurePrior to TIP testing, the Contractor shall provide the Engineer and TIP Consultant with a recordof all shaft lengths with elevations of the top and bottom, field volume logs, Thermal Wire Cableserial numbers installed with corresponding location in the shaft, and the installation date andtimes for all shafts.Thermal Wire Cables shall be connected to a Thermal Access Port (TAP) immediately followingcasting. Care shall be taken to record the position of each cable in the cage by serial number.Data shall be collected by the TAP at intervals of time specified by the Engineer (typically every15 minutes) for a duration of time specified by the Engineer (typically 12 to 48 hours, dependingon shaft diameter; often 24 hours is sufficient to reach the peak temperature) or as recommendedby the TIP Consultant. In the event peak temperature is not reached within the specified timeperiod, the TAP units shall remain connected to the Thermal Wire Cables for a longer durationas directed by the TIP Consultant. After completion of the data collection period, the TAP shallbe connected to the main TIP data acquisition unit and the data files shall be downloaded forinspection of temperatures versus depth.Potential local anomalies indicated by locally low temperatures relative to the averagetemperature at that depth, or average temperatures significantly lower than the averagetemperatures at other depths, shall be immediately reported to the Engineer.(Note: In case anomalies are detected, additional TIP tests are not typically necessary. Moredetailed TIP analysis may be performed on the originally collected data.)
October 20174. TIP TESTING RESULTS4.1 Results by the TIP shall be presented in a written report within 5 working days of completionof the testing. The report shall present results of TIP tests by including:4.2 The final analysis must include top of shaft and bottom of shaft adjustments per themanufacturer’s recommendations, so that the temperature plots are adjusted for end effects.4.3 Graphical displays of all temperature measurements versus depth.4.4 Indication of unusual temperatures, particularly significantly cooler local deviations of theaverage at any depth from the overall average over the entire length.4.5 The overall average temperature. This temperature is proportional to the average radiuscomputed from the actual total concrete volume installed (assuming a consistent concrete mixthroughout). Radius at any point can then be determined from the temperature at that pointcompared to the overall average temperature.4.6 Variations in temperature between Thermal Wire Cables (at each depth) which in turncorrespond to variations in cage alignment.Where concrete volume is known the cage alignment, or offset from center, should be noted.MEASUREMENTThis item measured by each successful test that is approved by the Engineer. Quantities of TIPtesting will be shown on the plans.BASIS OF PAYMENTThe completed TIP results and report shall be paid for at the contract bid price for “ThermalIntegrity Profiling” (for each shaft, per linear meter or foot, or per day of testing). This shallconstitute full compensation for all costs incurred and relating to the TIP testing including, butnot limited to, procurement, preparation and installation, conducting the tests, and subsequentreporting of results.(Note: Payment for Thermal Wire Cable data collection is dependent on the TIP Consultant’sinvolvement with the process. If the TIP Consultant is on site to personally collect data, the “perday of testing” basis is considered the most equitable. If the data is sent electronically to the TIPConsultant the “per shaft tested” basis may be more equitable. If a “per shaft” basis is requiredfor a Thermal Wire Cable project, and the project has variable shaft lengths and diameters, thenmultiple pay items should be created for each group of shafts with similar nominal diametersand lengths.)
October 2017TERMAL INTEGRITY PROFILER SPECIFICATIONSMain UnitPhysical:Size: 272 X 212 X 40 mmWeight: 1.5 KgSunlight readable VGA color display for any lighting conditions, resolution 640 x 480 pixelsScreen size: 21.3 cm (8.4”)Temperature Range: Operating: 0 to 40 C; Storage 20 to 65 CPowered by Internal Battery (8 hours duration)Contains 6 installed Li-Ion batteries (3.84 grams Equivalent Lithium Content (ELC))ElectronicMicroprocessor: PXA270 @ 520 MHzData Storage: Built in 2 GB driveUSB port for easy data retrievalThermal Acquisition Port for Wires (TAP)Size: 133 X 102 X 57 mmWeight: 766 gTemperature Range: -20 to 65 operating; -40 to 85 C storageContains 1 installed Li-Ion battery. or .64 grams ELCInternal Battery (28-day duration)Sampling frequency: user programmable, defaulted to once every 15 minutesHangs from reinforcement cage; may be bolted to cage for securityWater resistantThermal Wire Brand CablesSensor type: digitalFurnished in rolls of length starting at 6 m (20 ft.) with length increments of 1.5 m (5 ft.).Sensor spacing: 305 mmSensor operating temperature: up to 105 COtherSoft carrying caseFull one-year warrantyOperates in English or Metric unitsTechnical manual included
Nondestructive Testing (NDT) shall be performed using the Thermal Integrity Profiler Wire Cable methodology, or equal, to provide analytical data for the entire shaft (cage and cover) radius. The Thermal Integrity Profiler (TIP) method uses the heat generated by curing cement (hydration
Compute Command Line Profiler DU-05982-001_v03 4 COMPUTE COMMAND LINE PROFILER OVERVIEW This document is intended for users of Compute Command Line Profiler for NVIDIA CUDATM technology. Compute Command Line Profiler is a command line based profiling tool that can be used to measure performance and find potential opportunities for
The Profiler Plus and Profiler Plus ID Kits contain all the necessary reagents for the amplification of human genomic DNA. The reagents are designed for use with the following Applied Biosystems instruments: Applied Biosystems 3100/3100-Avant Genetic A
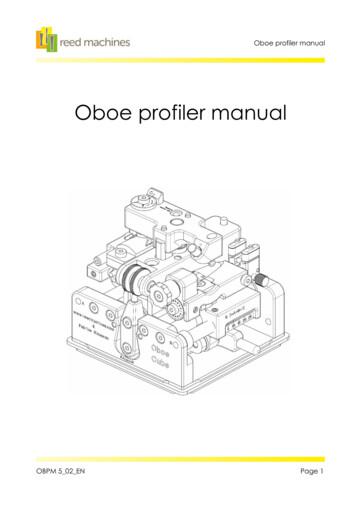
The oboe profiler copies the geometry of a template to a reed. Depending on the template the oboe profiler can do this for all types of oboe reed. Features of the oboe profiler: Unique compact design with a hard cover. Adjustments: o Length of the tip. o Length of the scrape. o Thickness of the scrape. o Thickness at the back of the scrape.
ANTS Memory Profiler 7 documentation About ANTS Memory Profiler ANTS Memory Profiler enables you to profile memory usage of applications written in any of the languages available for the .NET Framework, including Visual Basic .NET, C#, and Managed C . This is useful,
ANTS Performance Profiler 7 documentation About ANTS Performance Profiler ANTS Performance Profiler enables you to profile the code of applications written in any of the languages available for the .NET Framework, including Visual Basic .NET, C#, and Managed C . This is u
The O*NET Interest Profiler The O*NET Interest Profiler (IP) is an interest inventory designed for use in educational planning, career exploration, career guidance, and organizational placement (Lewis & Rivkin, 1999). The Interest Profiler is one of several O*NET Career Exploration Tools publicly available
1. From the Start menu, choose Programs Microsoft SQL Server Profiler to start SQL Profiler. 2. From the SQL Profiler menu, choose File New Trace Template. 3. Click Save As to save the trace template. 4. Save the Template as tutorial.tdb in the default directory for SQL Server. 5. In the Trace Properties dialog box, click the Events tab. 6.
The handbook Architectural Graphic Standards was first published in 1932, the same year and in the same city that the exhibition The International Style opened at The Museum of Modern Art in New York. The coincidence of these two events underscores the bifur cation in modern architectural practice between appearance and function. While the show emphasized formal composi tional principles to .


