Samsung Gear S3 User Guide - T-Mobile
WEARABLEUser ManualPlease read this manual before operatingyour device and keep it for future reference.
LegalWARNING! This product contains chemicals known tothe State of California to cause cancer, birth defects, orother reproductive harm. For more information, pleasecall 1-800-SAMSUNG (726-7864).Note: Water-resistant and dustproof based on IP68rating, which tests submersion up to 5.0 feet for up to30 minutes.Maintaining Water and DustResistanceThis device is rated IP68 using the Ingress Protectionrating system.Your device has been tested in a controlledenvironment and shown to be water and dust resistantin certain circumstances (meets requirements ofclassification IP68 as described by the internationalstandard IEC 60529 - Degrees of Protection providedby Enclosures [IP Code]; test conditions: 15-35 C,86-106 kPa, 5.0 feet, for 30 minutes). Despite thisclassification, your device is not impervious to waterdamage in any situation. It is important that allcompartments are closed tightly.Note: If any liquid is found to have entered yourdevice components or an internally sealed system,this condition will void your device warranty.TMO R765T EN UM TN PJ4 100716 R3
Follow these tips carefully to prevent damage to thedevice. Any device which uses accessible compartments orports that can be opened should have these sealedor closed tightly to prevent liquid from enteringthe system. Whenever your device gets wet, dry it thoroughlywith a clean, soft cloth.The touchscreen and other features may not workproperly if the device is used in water or in otherliquids. [071516]Intellectual PropertyAll Intellectual Property, as defined below, owned byor which is otherwise the property of Samsung or itsrespective suppliers relating to the SAMSUNG mobiledevice, including but not limited to, accessories, parts,or software relating there to (the “mobile device”), isproprietary to Samsung and protected under federallaws, state laws, and international treaty provisions.Intellectual Property includes, but is not limited to,inventions (patentable or unpatentable), patents, tradesecrets, copyrights, software, computer programs, andrelated documentation and other works of authorship.You may not infringe or otherwise violate the rightssecured by the Intellectual Property. Moreover, youDo not expose the device to salt water or ionizedwater, or to water over 5.0 feet deep for more than30 minutes. If your device is exposed to fresh water,dry it thoroughly with a clean, soft cloth. If thedevice is exposed to any liquid other than freshwater, rinse the device with fresh water immediatelyand dry it thoroughly with a clean, soft cloth.Failure to rinse the device in fresh water and dry itas instructed may cause the device to suffer fromoperability or cosmetic issues.Do not expose the device to water at high pressure.LegalIf the device is dropped or receives an impact, thewater and dust resistant features of the devicemay be damaged.ii
Disclaimer of Warranties; Exclusionof Liabilityagree that you will not (and will not attempt to)modify, prepare derivative works of, reverse engineer,decompile, disassemble, or otherwise attempt to createsource code from the software. No title to or ownershipin the Intellectual Property is transferred to you. Allapplicable rights of the Intellectual Property shallremain with SAMSUNG and its suppliers.EXCEPT AS SET FORTH IN THE EXPRESS WARRANTYCONTAINED ON THE WARRANTY PAGE ENCLOSEDWITH THE PRODUCT, THE PURCHASER TAKES THEPRODUCT “AS IS”, AND SAMSUNG MAKES NO EXPRESSOR IMPLIED WARRANTY OF ANY KIND WHATSOEVERWITH RESPECT TO THE PRODUCT, INCLUDING BUT NOTLIMITED TO THE MERCHANTABILITY OF THE PRODUCTOR ITS FITNESS FOR ANY PARTICULAR PURPOSE ORUSE; THE DESIGN, CONDITION OR QUALITY OF THEPRODUCT; THE PERFORMANCE OF THE PRODUCT;THE WORKMANSHIP OF THE PRODUCT OR THECOMPONENTS CONTAINED THEREIN; OR COMPLIANCEOF THE PRODUCT WITH THE REQUIREMENTS OFANY LAW, RULE, SPECIFICATION OR CONTRACTPERTAINING THERETO. NOTHING CONTAINED IN THEINSTRUCTION MANUAL SHALL BE CONSTRUED TOCREATE AN EXPRESS OR IMPLIED WARRANTY OF ANYKIND WHATSOEVER WITH RESPECT TO THE PRODUCT.IN ADDITION, SAMSUNG SHALL NOT BE LIABLE FOROpen Source SoftwareSome software components of this product incorporatesource code covered under GNU General PublicLicense (GPL), GNU Lesser General Public License(LGPL), OpenSSL License, BSD License and otheropen source licenses. To obtain the source codecovered under the open source licenses, please visit:opensource.samsung.comLegaliii
ANY DAMAGES OF ANY KIND RESULTING FROM THEPURCHASE OR USE OF THE PRODUCT OR ARISINGFROM THE BREACH OF THE EXPRESS WARRANTY,INCLUDING INCIDENTAL, SPECIAL OR CONSEQUENTIALDAMAGES, OR LOSS OF ANTICIPATED PROFITS ORBENEFITS.Samsung KnoxModification of SoftwareSamsung Electronics America (SEA),Inc.Samsung Knox is Samsung’s security platform and isa mark for a Samsung device tested for security withenterprise use in mind. Additional licensing fee may berequired. For more information about Knox, please referto: samsung.com/us/knox [090116]SAMSUNG IS NOT LIABLE FOR PERFORMANCE ISSUESOR INCOMPATIBILITIES CAUSED BY YOUR EDITINGOF REGISTRY SETTINGS, OR YOUR MODIFICATION OFOPERATING SYSTEM SOFTWARE.Address:85 Challenger RoadRidgefield Park,New Jersey 07660USING CUSTOM OPERATING SYSTEM SOFTWARE MAYCAUSE YOUR DEVICE AND APPLICATIONS TO WORKIMPROPERLY. YOUR CARRIER MAY NOT PERMIT USERSTO DOWNLOAD CERTAIN SOFTWARE, SUCH AS CUSTOMOS.LegalPhone:1-800-SAMSUNG (726-7864)Internet Address:samsung.comiv
Legal Information 2016 Samsung Electronics America, Inc. Samsung,Samsung Galaxy, S Health, and S Voice are alltrademarks of Samsung Electronics Co., Ltd.Important legal information can be accessed in writingon the mobile device or at samsung.comOther marks are the property of their respectiveowners.READ THIS INFORMATION BEFORE USING YOURMOBILE DEVICE.Note: Screen images are simulated. Appearance ofdevice may vary.Samsung Limited Warranty - This product is coveredunder the applicable Samsung Limited WarrantyINCLUDING ITS DISPUTE RESOLUTION PROCEDUREand your right to opt out of arbitration within 30calendar days of the first consumer purchase. Youmay opt out by either sending an email tooptout@sea.samsung.com with the subject line“Arbitration Opt-Out” or by calling 1-800-SAMSUNG(726‑7864). For more detailed procedures, please referto the “Dispute Resolution Procedures and Arbitrationand Opt-Out” section of the Limited Warranty.Do you have questions about your SamsungMobile Device?For 24 hour information and assistance, we offer a newFAQ/ARS System (Automated Response System) at:samsung.com/us/supportThe actual available capacity of the internal memory isless than the specified capacity because the operatingsystem and default applications occupy part of thememory. The available capacity may change when youupgrade the device.LegalThe online version of the End User License Agreement(EULA) for your device can be found online at:samsung.com/us/Legal/SamsungLegal-EULAGEARv
Table of ContentsGetting Started. 1Navigate the Screen. 29Front View.2Enter Text. 30Back View.3Applications. 34Buttons.4Apps Screen. 35Wireless Charger Dock.5Messages.37Assemble Your Gear.6Phone. 38Set Up Your Gear. 11Contacts. 40Know Your Device.16S Health.41Home Screen. 17Samsung Pay. 50Status Panel.21Weather. 52Use the Bezel. 24Music Player. 53Navigation . 26S Voice. 55
Reminders.57Connections.77Alti-Barometer. 58Security. 82Schedule. 59Accessibility. 83Alarm. 60Input. 85World Clock. 61Power Saving. 87News Briefing. 62Gear Info. 88Gallery. 63Connect to a Phone. 89Find My Phone. 65Connect to a New Phone. 90Email. 66Samsung Gear App.91Settings.67Introduction. 92Style. 69Info Tab. 93Sounds and Vibration. 70Settings Tab. 94Device. 73Display.74Call.75Messages.76Table of Contentsvii
Getting StartedLearn about your device hardware,assembly procedures, and how toget started using your new device.
Front View1. Back button: Press to return to the previousscreen.6542. Microphone (behind): Detect voice commands.3. Home/Power button: Press and hold to turn thedevice on or off. Press to open the Apps screen orthe Watch screen.124. Light sensor: Use the ambient light level to adjustthe screen brightness and contrast.35. Bezel: Rotate to easily control various functions.6. Touchscreen: Tap to open an app, select a menuitem, tap a displayed icon, or enter a characterusing the keyboard.Getting Started2Front View
Back View11. Heart rate sensor: Measure your heart rate usingyour wrist when using the S Health app. For moreinformation, see “S Health” on page 41.22. Speaker: Play music and other sounds.3. GPS antenna: Track your location with GPS.3Getting Started3Back View
ButtonsFunctionHome/Power Press and hold to turn the Gear on or off.Press to turn on the screen.Press and hold for more than seven seconds torestart the Gear.Press to open the Apps screen when you are onthe Watch screen.Press to open the Watch screen when you are onany other screen.Back Press to return to the previous screen.Getting Started4Buttons
Wireless Charger Dock1. USB charger port: Connect the USB charger.2. LED indicator: Changes colors to indicate thecharge.313. Wireless charging surface: Charge the batterythrough the wireless charging surface.2Getting Started5Wireless Charger Dock
Assemble Your GearPrepare and charge your device before use.Charge the BatteryCharge the battery before using it for the first time orwhen it sits unused for extended periods.Warning: Use only charging devices and batteriesapproved by Samsung. Samsung accessories aredesigned for your device to maximize battery life. Usingother accessories may invalidate your warranty andmay cause damage.2. Plug the USB charger head into an electric socket.1. Connect the USB cable to the USB charger head.Then, connect the other end of the USB cable to thewireless charger dock. 3. Place the Gear into the wireless charger dock.Before charging the Gear, remove the rubbercover from the charging dock.Getting Started6Assemble Your Gear
Color and Charge Status Red: Charging.Green: Fully chargedOrange: Connected to a low-charger headNote: When a wireless charger dock error occurs, theLED indicator flashes red. Disconnect the Gear from thewireless charger dock, and then reconnect. If the erroroccurs again, contact a Samsung Service Center forservice support.Check the Charge StatusWhen you connect the Gear and the wireless chargerdock, the wireless charger dock’s LED indicator flashescertain colors to indicate the battery level.Getting StartedRed Green Orange: Standby mode7Assemble Your Gear
Battery Charging Tips andPrecautions If the battery is completely discharged, the Gearcannot be turned on immediately after beingconnected to the charger. Allow a depleted batteryto charge for a few minutes before turning onthe Gear.If the Gear receives an unstable power supply whilecharging, the touchscreen may not function. If thishappens, immediately disconnect the Gear from thewireless charger dock and leave the device asideuntil another power connection can be found.Wear the GearIf you use multiple apps at once, the battery willdrain quickly. To avoid losing power during a datatransfer, always use these apps after fully chargingthe battery.Put on the Gear1. Open the buckle and place the strap aroundyour wrist.Using a power source other than the charger, such asa computer, may result in a slower charging speeddue to a lower electric current.2. Fit the strap to your wrist, insert the pin into anadjustment hole, and then secure the buckle toclose it.If the Gear is being charged with other devices usinga multi-charger, charging may take longer.Getting StartedThe Gear can be used while it is charging, but it maytake longer to fully charge the battery.8Assemble Your Gear
Replace the StrapStrap Tips and Precautions Some people may experience discomfort whenwearing the Gear for prolonged periods.Detach the strap from the Gear to replace it with a newone.If you have sensitive skin or fasten the Gear tootightly, you may feel some discomfort.1. Slide the strap’s spring bar inwards and pull thestrap away from the Gear.Do not expose the straps to very wet conditions.Wet straps can cause skin irritations. Dry the strapsfirst. If you experience skin irritation when wearingthe device, stop wearing the device and consult aphysician.The Gear and the strap have passed the hazardousmaterials test and meet international safetystandards.Getting Started9Assemble Your Gear
2. Insert one end of the spring bar into the lug, slidethe spring bar inwards, and connect the strap.Getting Started10Assemble Your Gear
Set Up Your GearTurn the Gear On or Off2. To turn off the Gear, press and hold the Powerbutton, and then tap Power off.1. Press and hold the Power button for a few secondsto turn on the Gear. When you turn on the Gear for the first time orreset it, a pop-up window is displayed. Followthe prompts to download and install theSamsung Gear app on your smartphone.Getting Started11Set Up Your Gear
Connect the Gear to a Smartphone To connect your Gear to a smartphone, install theSamsung Gear app on the smartphone. Launch Galaxy Apps or visit apps.samsung.com/gearfrom your smartphone to download it. Fornon‑Samsung devices, download the Samsung Gearapp from the Google Play store. Compatible with select devices using Android 4.4 andlater with at least 1.5 GB RAM. Supported devices mayvary by carrier and device. Some features may not beavailable. For best results, connect with compatibleSamsung Galaxy devices. For a list of compatiblesmartphones, please visit samsung.com/gearS3.Getting Started12Connection methods and screenshots may varydepending on your device and software version.You cannot install the Samsung Gear app onsmartphones that do not support Gear syncing.Ensure that your smartphone is compatible with aGear.Supported smartphones and features may varydepending on your region, service provider, anddevice manufacturer. Visit samsung.com and searchfor your Gear device’s support page to view a list ofcompatible smartphones.Set Up Your Gear
Connect the Gear to a NewSmartphone1. Turn on the Gear.2. On the smartphone, tap Apps Samsung gear.When you connect the Gear to another smartphone, theGear automatically resets and all data is removed fromits memory. Make sure you back up any important datastored on your Gear.If necessary, update the Samsung Gear app tothe latest version.3. Tap Connect to gear.4. When the Bluetooth pairing request window isdisplayed, confirm the passkeys displayed on yourGear and smartphone match, and then tap thecheckmark.1. Back up your Gear’s data on your smartphone asfollows: 5. Follow the prompts to complete the connection.When the devices are connected, a tutorial is displayedon the Gear’s screen. Follow the prompts to learn theGear’s basic controls.On the smartphone, tap Apps Samsung gear Settings tab About gear Back up and restore Back up data.2. End the connection between your Gear andsmartphone. For more information, see “Disconnectthe Gear” on page 92.3. Connect your Gear to another smartphone. Getting Started13A new Gear device cannot connect to asmartphone that is already paired withanother Gear.Set Up Your Gear
Remote ConnectionTurn the Screen On or OffYou can remotely connect the Gear to your smartphonewhen a Bluetooth connection is not available. With thisconnection, you can still receive notifications from yoursmartphone. This feature is automatically activatedwhen you connect to your smartphone using Bluetoothfor the first time.To turn on the screen: Rotate the bezel, press the Home button or theBack button, or use a wake-up gesture. For moreinformation, see “Device” on page 73.To turn off the screen: Cover it with your palm.If this feature is not turned on: On your smartphone, tap Apps Samsung gear Settings tab Gear connection, and then tapRemote connection.Getting Started14The screen turns off if the Gear is not used for aspecified period.Set Up Your Gear
Set a Screen LockPrevent others from accessing your Gear when you arenot wearing it.If you set the screen lock feature, the Gear requires anunlock code whenever unlocking it.PIN On the Apps screen, rotate the bezel toSettings Security Screen lock Screen lock type PIN. A PIN consists of numbers only. Enter fournumbers, and then enter the PIN again toverify it.Unlock the Gear Turn on the screen and enter the unlock code.Getting Started15Set Up Your Gear
Know Your DeviceLearn some of the key features ofyour device, including the screensand icons, as well as how to navigatethe device and enter text using thekeyboard.
Home ScreenIntroductionChange the Watch Face1. Touch and hold the Watch screen, and then rotatethe bezel to view available watch faces.The Watch screen is the starting point for the Homescreen. Rotate the bezel to view items on the screen,such as notifications and widgets. Watch ScreenYou can add more watch faces by rotating to thelast screen and tapping Get more watch faces.2. Tap the watch face to select it.View the current time. You can also check the batterylife, the date, your step count, and more. Options varydependent on which screen is visible. You can customize the watch face by tappingStylize.You can also change the Gear’s watch face on yoursmartphone. On the smartphone, tap Apps Settings tab Watch faces.Samsung gear Press the Home button to open the Watch screenwhen you are not on the Watch screen.Know Your Device17Home Screen
NotificationsDelete Notifications1. Rotate the bezel left to view notifications.Stay up to date with events, notifications, andmessages from your smartphone.2. Swipe upward from the bottom edge of the screento delete all notifications.When you receive a notification, it is displayed at thetop of the screen and disappears after a few secondsand the Gear vibrates.Block Notifications1. Select a notification from the app you want toblock.To view notifications:1. Rotate the bezel left.2. Tap the notification to view the details.2. Tap the notification screen to view the notification’sdetail.3. Tap More options, rotate the bezel to Block appand tap Block app.View Other Notifications 1. Rotate the bezel left to view notifications.2. Tap the number at the bottom of the screen.Know Your DeviceThe Gear no longer receives notifications fromthe app.Note: You can block specific app notifications beforeyou receive them by using the Limit notificationssettings on your smartphone. For more information,see “Notifications” on page 94.18Home Screen
WidgetsYou can add widgets to the Home screen. Widgets aresmall apps that offer limited functionality to provideinformation and convenient access.Know Your DeviceShortcutsRecent appWeatherContactsReminderSchedule24 hour logFloorsAlti-barometerNews BriefingMusic player19Home Screen
Add WidgetsYou can add more widgets on the Home screen. Rotate the bezel to the end of the Widgets, and tapAdd widget and select a widget. The selected widget is displayed in a new panel.Remove Widgets Touch and hold a widget and then tapKnow Your DeviceDelete.20Home Screen
Status PanelThis panel allows you to view the current status and configure basic settings. On the Watch screen, swipe downward from the top edge of the screen.1. Status bar: Displays device indicator icons.12. Brightness: Adjust the brightness of the screen.7TMO263543. Sound: Adjust the device volume.4. Do not disturb: Block all notifications and alerts.5. Airplane mode: Disconnect your device from allnetworks and turn off connectivity.6. Call forwarding: Forward calls to your Gear.7. Music player: Play music from your Gear.Know Your Device21Status Panel
Indicator IconsIndicator icons display at the top of the screen. The icons listed in this table are most common.4G: The device is connected to a 4G LTE wireless network.Bluetooth headset connected: A bluetoothheadset is connected.Signal strength: Cellular network signalstrength.Wi-Fi connected: Wi-Fi is connected.Airplane mode: Airplane mode is enabled.Battery full: Battery is fully charged.Bluetooth connected: Bluetooth isconnected.Bluetooth disconnected: Bluetooth isdisconnected.Know Your Device22Status Panel
Adjust the BrightnessAirplane ModeYou can adjust the Gear’s display brightness to suit theenvironment.Airplane mode disconnects your device from allnetworks and turns off connectivity features, such asphone calls and Wi-Fi. On the status panel, tapBrightness and adjustthe brightness by rotating the bezel. On the status panel, tap Adjust the SoundYou can adjust the Gear’s sound settings.Call Forwarding On the status panel, tapSound and adjust thesound by rotating the bezel.You can forward call from your smartphone to yourGear.Do Not Disturb Mode On the status panel, tapYou can set the Gear not to vibrate and turn off thescreen when a notification is received (except foralarms). On the status panel, tap Call forwarding.Play MusicYou can play music saved on the Gear or smartphone.Do not disturb. On the status panel, tapTheDo not disturb icon is displayed at thetop of the Watch screen.Know Your DeviceAirplane mode.TheAirplane mode icon is displayed at thetop of the Watch screen.23Music player.Status Panel
Use the BezelSelect an ItemRotate the bezel to easily control the Gear’s variousfunctions.Rotate the bezel to highlight the item you want toselect and then tap the item. When you rotate thebezel, the highlight indicator moves in the samedirection.Scroll Through ScreensRotate the bezel to view other screens. On the Watchscreen, rotate the bezel left to view notifications.Know Your Device24Use the Bezel
Adjust the Input ValueReceive or Reject CallsRotate the bezel to adjust the volume or brightness.When a call is received: On the status panel, tapBrightness and adjustthe brightness by rotating the bezel. Rotate the bezel clockwise to answer an incomingcall.– or –Rotate the bezel counter‑clockwise to reject anincoming call.6Know Your Device825Use the Bezel
NavigationLearn the basics for how to navigate through your device by touch.Touchscreen NavigationTapUse the following motions and gestures on yourtouchscreen to navigate the device.Tap to open an app, select a menu item, tap a displayedicon, or enter a character using the keyboard.The Gear may not recognize touch inputs close to theedges of the screen, which are outside of the touchinput area.Note: Touchscreens respond best to a light touch fromthe pad of your finger or a capacitive stylus. Usingexcessive force or a metallic object when pressingon the touchscreen may damage the tempered glasssurface and void the warranty.Know Your Device26Navigation
Touch and HoldDragTouch and hold the screen for two or more seconds toaccess Edit mode or to view available options.To move an item, touch and hold it, and then drag it tothe target position.Know Your Device27Navigation
SwipeSwipe to the left or right to view other panels.Know Your Device28Navigation
Navigate the ScreenLearn how to navigate through your device using the buttons.Return to the Previous ScreenSwitch between the Watch andApps Screen Press the Back button. You can also swipe downfrom the top edge of the screen.1. When you are on the Watch screen, press the Homebutton to open the Apps screen.2. When you are not on the Watch screen, press theHome button to return to the Watch screen.Know Your Device29Navigate the Screen
Enter TextText can be entered using a keyboard or by speaking.IntroductionVoice InputA text input screen is displayed automatically whenyou are able to enter text. Select an emoticon or texttemplate to enter a message. You can also use voiceinput or the keyboard to type texts.1. TapVoice input and speak the message youwant to enter. Tap Send when you are finished.2. Tap More options Input languages to changethe language.Note: The screen layout may be different depending onthe app you launch.Know Your Device30Enter Text
Voice input is not supported in some languages.EmojisWhen the Gear is connected to a smartphone usingBluetooth, the language settings applied on thesmartphone are applied to the Gear.You can add emojis to your message. TapEmojis, and select an emoji to include inyour message.For better voice recognition: -- Speak clearly.-- Speak in quiet places.-- Do not use offensive or slang words.-- The Gear may not recognize your commands orTo draw your own image, tap Doodle.may perform unwanted commands depending onyour surroundings or how you speak.Know Your Device31Enter Text
KeyboardEnter CharactersUse the keyboard to enter your message.1. TapKeyboard, and then rotate the bezel tocharacter mode.Change the Input Mode2. Tap the corresponding key repeatedly until thedesired character is displayed. Rotate the bezel to change the input mode. You can switch between handwriting mode,character mode, number mode, punctuationmode, and voice input.Handwriting Mode TapKeyboard, and then use your handwriting toenter text.Know Your Device32Enter Text
Add Input Languages1. Rotate the bezel to change the input mode tonumber mode or punctuation mode.2. TapSettings Select input languages andselect a language to add. You can use up to two languages.You can also add more languages from theSettings screen. For more information, see“Keyboard Settings” on page 85.Change the Input Language Slide the space key left or right.Know Your Device33Enter Text
ApplicationsLearn about the applicationsthat are available on yourdevice.
Apps ScreenThe Apps screen displays icons for all apps.Open Apps1. From the Watch screen, press the Home button togo to the Apps screen.On the Apps screen, tap an app icon to open the app.To open an app from the list of recently used apps:2. To view other panels, rotate the bezel. You can alsotapApps screen or swipe the screen to the leftor right. From the Apps screen, rotate the bezel toRecent apps, and select the recent app window.Close Apps1. From the Apps screen, rotate the bezel toRecent apps.2. Rotate the bezel to highlight the app you want toclose, and then tapClose. Applications35Tap Close all to close all running apps.Apps Screen
Move ItemsUninstall Apps From the Apps screen, touch and hold the screen,touch and hold an app, and then drag it to thedesired location.You can only uninstall the downloaded Gear appson your smartphone. For more information, see“Uninstall Apps” on page 95. Y
or which is otherwise the property of Samsung or its respective suppliers relating to the SAMSUNG mobile device, including but not limited to, accessories, parts, or software relating there to (the “mobile device”), is proprietary to Samsung and protected under feder
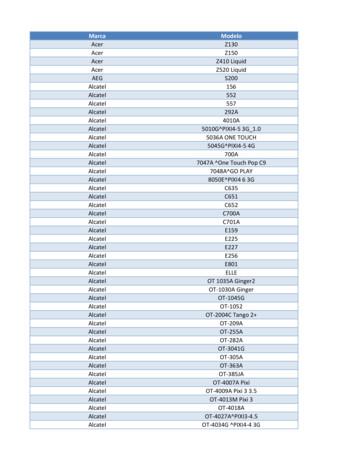
Samsung SGH-D807 Samsung SGH-D900 Samsung SGH-E215L Samsung SGH-E251L Samsung SGH-E256 Samsung SGH-E316 Samsung SGH-E356 Samsung SGH-E376 Samsung SGH-E496 Samsung SGH-E608 Samsung SGH-E630 Samsung SGH-E720 Samsung SGH-E736. Marca Modelo Samsung SGH-E786 Samsung SGH-E906 Samsung SGH-F250L Samsung SGH
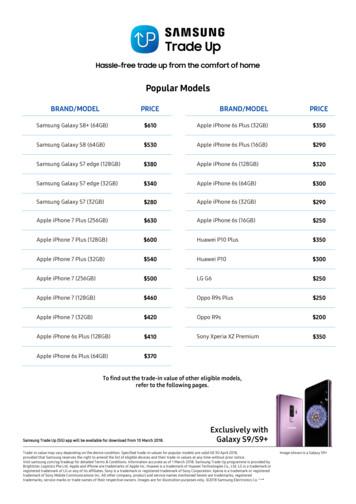
Samsung Galaxy S6 (32GB) 100 Samsung Galaxy S5 60 Samsung Galaxy A9 Pro 250 Samsung Galaxy A8 100 Samsung Galaxy A7 2017 200 Samsung Galaxy A7 2016 130 Samsung Galaxy A7 50 Samsung Galaxy A5 2017 150 Samsung Galaxy A5 2016 100 Samsung Galaxy A5 50 Samsung Galaxy A3 2016 80 Samsung Galaxy
4. Samsung Galaxy Watch Active User Manual Samsung Galaxy Watch Active User Manual - Download [optimized]Samsung Galaxy. 5. Samsung Galaxy Watch Active User Manual Samsung Galaxy Watch Active User Manual - Download [optimized]Samsung Galaxy. 6. SAMSUNG Galaxy Watch Active User Manual Samsung Galaxy Watch Active Quick Start Guide 1 .
Samsung Electronics America (SEA), Inc. Address: 85 Challenger Road Ridgefield Park, New Jersey 07660 Phone: 1-800-SAMSUNG (726-7864) Internet Address: samsung.com 2016 Samsung Electronics America, Inc. Samsung, Samsung Galaxy, Multi Window, S Pen, S Health, S Voice, Samsung Pay, and Samsung Milk Music are all
www.samsung.com User Manual SM-C200 English. 05/2016. Rev.1.0. 2 . Basics 3ead me first R 4 About the Samsung Gear 360 5 Package contents 6 Device layout 8 Indicator light 9 Camera status screen 11 Memory card 14 Battery 17 Mounting the Samsung Gear 360 onto the tripod 18 Turning the Samsung Gear 360 on and off 18 Connecting the Samsung Gear .
Work out the gear ratios of these gears: (numbers inside the circles are the numbers of teeth on each gear) Blue drive gear, green driven gear, pink idler gear, yellow compound gear 1: Simple meshed gear 2: Simple gear train with idler gear 15 3: Compound gear train 4: Choose the correct words to make these statements true for these gear trains.
Add a Samsung account. Sign in to your Samsung account to access exclusive Samsung content and make full use of Samsung apps. 1. From Settings, tap Accounts and backup Accounts. 2. Tap Add account Samsung account. TIP To quickly access your Samsung account, from. Settings tap Samsung account. Add an email account
Samsung Account . Create a Samsung account for access to Samsung content and apps on your device. When you turn on your device for the irst time, set up your existing Samsung account or create a new Samsung account. – or – To create a new Samsung account or set up your Samsung account on your device at any time, use Accounts settings.

