10031483 BDA Feuerschale Blumfeldt - Cloudinary
TrojaFeuerschaleFire bowlCuenco de fuegoBol à feuCoppa del fuoco10031483 10035976
Sehr geehrter Kunde,wir gratulieren Ihnen zum Erwerb Ihres Artikels. Lesen Sie die folgenden Hinweisesorgfältig durch und befolgen Sie diese, um möglichen Schäden vorzubeugen. FürSchäden, die durch Missachtung der Hinweise und unsachgemäßen Gebrauchentstehen, übernehmen wir keine Haftung.Artikel10031483, 10035976FeuerschaleLieferumfang1423563
SicherheitshinweiseWARNUNGErstickungsgefahr! Die Feuerstelle ist nur zur Nutzung im Freien bestimmt. Er darf nichtin Gebäuden, Garagen oder anderen geschlossenen Bereichen verwendet werden. Eskönnen sich giftige Dämpfe bilden, die zum Ersticken führen. Die Feuerstelle ist nicht für gewerbliche Zwecke geeignet. Die Feuerstelle darf nur von Erwachsenen verwendet werden. Kinder und Haustiere müssen einensicheren Abstand einhalten. Verwenden Sie zum Anzünden kein Benzin, Brennspiritus, Feuerzeugbenzin oder Alkohol. Benutzen Sie die Feuerstelle nicht, bevor sie nicht vollständig zusammengebaut wurde und alleTeile fest sitzen. Verwenden Sie die Feuerstelle nicht auf Untergründen aus Holz oder anderen brennbaren Materialien. Leeren Sie die Feuerstelle nach jeder Verwendung. Lassen Sie eine dünne Ascheschicht darin, umden Boden zu schützen. Nehmen Sie die Asche erst heraus, wenn die Kohle komplett abgebranntund die Asche abgekühlt ist. Fassen Sie die Feuerstelle erst an, wenn er komplett abgekühlt ist; Tragen Sie währedn demBetrieb hitzebeständige Handschuhe. Verstauen Sie die Feuerstelle erst wenn sie komplett abgekühlt ist und die Asche entsorgt wurde. Verwenden Sie immer Werkzeuge und hitzebeständige Handschuhe, wenn Sie Brennmaterialhinzufügen oder die Feuerstelle bewegen. Lassen Sie die Feuerstelle während der Benutzung nicht unbeaufsichtigt. Während der Benutzung kann heiße Glut aus der Feuerstelle fallen. Überladen Sie die Feuerstelle nicht mit Brennmaterial. Fügen Sie erst dann neues Brennmaterial hinzu,wenn das Feuer heruntergebrannt ist. Wenn ein Teil der Feuerschale rot glüht, ist sie überladen. Hinweis: Legen Sie Brennmaterial Nicht Direkt In Die Feuerschale Sondern Immer Auf Das PapierBzw. Das Brennholz. Halten Sie den Brennstoff von Wand der Feuerstelle fern, da die Wand vonhohen Temperaturen beschädigt werden kann. Atmen Sie den Rauch nicht ein und lassen Sie ihn nicht in die Ihre Augen kommen. Untersuchen Sie die Feuerstelle vor der Benutzung auf Beschädigungen. Durch die Benutzung kann sich die Metalloberfläche leicht verfärben.VORSICHT! VERWENDENSIE KEIN ALKOHOLODER BENZIN ZUMENTZÜNDEN ODERWIEDERENTZÜNDEN!4
Aufbau1. Stellen Sie die Basis (5) auf eine feste, flache, ebene und hitzebeständigeOberfläche, entfernt von brennbaren Gegenständen, auf.2. Setzen Sie die Feuerschale (4) die Basis (5).3. Setzen Sie den Ascherost (3) auf die Feuerschale (4).4. Setzen Sie den Grillrost (2) auf die Feuerschale (4).5. Setzen Sie das Schutzgitter (1) auf die Feuerschale (4).5
BenutzungFeuer entzünden Stellen Sie sicher, dass die Feuerstelle auf einem festen, flachen, ebenenund hitzebeständigen Untergrund, entfernt von brennbaren Gegenständen,aufgestellt ist. Am Boden der Feuerschale sollte sich etwas Asche befinden. Legen Sie Papier oder trockenes Brennholz in die Mitte desFeuerschalenbodens.Hinweis: Legen Sie Brennmaterial nicht direkt in die Feuerschalesondern immer auf das Papier bzw. das Brennholz. Zünden Sie das Paper oder Brennholz an.Achtung: Entfachen Sie erst ein kleines Feuer und lassen Sie es dannlangsam größer werden. Wenn sich die Hitze zu schnell und zu starkentwickelt, kann es zu Rissen in der Konstruktion kommen.Das Feuer schüren Geben Sie weiteres Brennmaterial hinzu, um die Hitze langsam zu steigern.Nicht mit Brennmaterial überladen. Drei kleine Scheite sind ausreichend. Beim Umsichten der Scheite sicheres Schürwerkzeug verwenden.Löschen Um die Feuerstelle zu löschen, kein Brennmaterial mehr dazugeben oder dasFeuer mit Sand ersticken. Auf keinen Fall mit Wasser löschen.6
Pflege Die Feuerstelle sollte regelmäßig auf Schäden überprüft werden, umSicherheit zu gewährleisten. Die Feuerstelle muss nach der Benutzung gereinigt werden. Verwenden Siekeine Ofenreiniger oder Scheuermittel, da diese das Gerät beschädigen. Wenn Sie die Feuerstelle nicht verwenden, lassen Sie sie abkühlen undüberziehen sie zum Schutz vor Witterung mit einer Abdeckung. Verstauen Sie den kamin an einem trockenen Ort aufbewahren, um dieProduktlebensdauer zu erhöhen. Da die Oberfläche aus Metall besteht, altert sie und fängt an Rostanzusetzen, sobald sie im Freien steht. Dies geschieht erwartungsgemäß,beeinträchtigt aber nicht die Funktion und ist kein Produktfehler.Entfernen Sie zur Erneuerung der Oberfläche lose Farbreste, wenn nötig miteiner Stahlbürste, und bestreichen Sie die Oberfläche mit hitzebeständigerFarbe (hitzebeständig bis mindestens 600 C). Reiben Sie den Kamin zur Reduzieren der Rostbildung nach der Verwendungmit einem Öllappen ein.Hersteller: Chal-Tec GmbH, Wallstraße 16, 10179 Berlin, Deutschland7
Dear Customer,Congratulations on purchasing this item. Please read this manual carefully andtake care of the following hints on installation and use to avoid technical damages.Any failure caused by ignoring the items and cautions mentioned in the operationand installation instructions are not covered by our warranty and any liability.Item10031483, 10035976Fire pitParts Included1482356
Safety Instructions This fire pit is for outdoor use only and shall not be used in a building, garage or any otherenclosed area. Toxic carbon monoxide fumes can accumulate and cause asphyxiation. This fire pit is not for commercial use. This fire pit should only be used by adults and all children and pets should be kept at a safedistance. Do not use petrol, white spirit, lighter fluid, alcohol or other similar chemicals to light a fire as arapid increase in temperature could damage the fire pit. This fire pit is only suitable for use withcharcoal, untreated wood or dry logs. Do not use coal. Do not use this fire pit until it is completely assembled and all parts are securely fastened andtightened. Do not use the fire pit on decking or any other flammable surfaces such as dry grass, wood chips,leaves. Always empty this fire pit after use. Leave a thin layer of ash to protect the bottom. Do not removeashes or charcoal until they are completely and fully extinguished. Do not touch the fire pit until it is completely cooled unless you are wearing heat resistant glovesas it is hot when in use. Do not handle or move the fire pit when in use as it is hot. Do not attempt to store the fire pit until all ashes and charcoals are completely extinguished. Always use a safety tool and heat resistant gloves when adding or moving fuel. Do not leave a burning fire unattended. Fire hazard-Hot embers may emit while in use. Do not overload the fire pit with fuel. Do not add additional fuel until the fire burns down. If anportion of the fire bowl is growing red, it is overloaded. NOTE: Do not burn fuel directly on the fire bowl base. Do burn on the log grate. Do keep the fuel away from the wall of the fire pit as the high temperature may damage it. Avoid breathing smoke from the fire and avoid getting it into your eyes. Always thoroughly inspect the fire pit before use. A slight discolouration of finish may occur after use. Spark off a small fire first and let it grow slowly. A sudden heat can lead to cracks in theconstruction.CAUTION! DO NOT USESPIRIT OR PETROLFOR LIGHTING ORRE-LIGHTING!9
Assembly1. Place the MGO body (5) on a permanent flat, level, heat resistant, nonflammable surface away from flammable items.2. Put firebowl (4) into the body (5).3. Put log grate (3) into the firebowl (4).4. Put grill (2) on the firebowl (4).5. Put mesh cover (1) on the firebowl (4).10
UseLighting Ensure the fire pit is positioned on a permanent flat, level, heat resistant,non-flammable surface away from flammable items. Make sure there is a small amount of ash in the fire bowl bottom. Place paper or dry kindling on the log grate provided in the centre of thefirebowl. Light the paper or dry kindling to start a fire.Note: Spark off a small fire first and let it grow slowly. A sudden heatcan lead to cracks in the construction.Tending the fire Add fuel to the fire pit to increase the heat slowly when embers glow. Do notoverload with fuel, only tow or three small logs is sufficient. When shifting logs, use a safety tool to allow for additional airflow.Extinguishing To extinguish the fire pit, stop adding fuel and allow fire to die or douse withsand. Do not use water as this may damage the fire pit.11
Care This firepit should be inspected on a regular base to ensure product safetyand longer product life. The firepit should be cleaned after use to ensure longer product life. Do notuse oven cleaner or abrasive cleaner as they will damage this product. When not in use, cover the firepit once completely cooled with a cover tohelp protect it from bad weather. Store this firepit in a dry location to maximise product life. As the firepit is made from steel, the surface will age and develop surfacerust as soon as it is placed outside and after use. This is to be expected,but it does not affect use and is not a product fault. Please see belowinstructions on how to refresh the paint finish. Remove loose paint and rust with a wire brush when needed and re-paintusing a high temperature paint, resistant to at least 600 C. To help reduce surface rust, rub the firepit with an oily rag after each use.Producer: Chal-Tec GmbH, Wallstraße 16, 10179 Berlin, Germany12
Der Grill und die Gerätschaften müssen vor dem Grillen sauber und frei von Lebensmittelresten sein. Geben Sie ca. 0,5 kg Kohle auf den Ascherost und entzünden Sie die Kohle nach den Anleitungen oben. Platzieren Sie den Rost auf die Feuerschale. Achten Sie darauf, dass der Rost fest aufl iegt.
Fangen Sie erste an zu grillen, wenn das Brennmaterial eine Ascheschicht hat. Das Grillgut muss vor dem Verzehr vollständig durchgegart sein. Entfernen Sie den Rost erst, wenn der Grill völlig abgekühlt ist. Reinigen Sie nach dem Grillen stets den Grillrost und das Grillbesteck.
The Business Data Architecture (BDA) has been updated and released at intervals and this is the seventh BDA release. Each release is considered a “cut” of the continuingly evolving data architecture. Up until BDA version six (the sixth “cut”), a new version was createdwhen significant changes had been made to the Business Data Architecture to warrant a new “cut”. BDA version six .
BDA Broadband Drop Amplifier The BDA Broadband Telecommunications Drop Amplifier is a two‐way 1 GHz amplifier designed for customer premise amplification. These amplifiers can be used to compensate for long drops and excessive splitting losses. Each BDA is housed within a robust
BDA-K4 - Placa difusora fabricada en plástico simi-lar a color RAL 8014 (sepia) BDA-K5 - Placa difusora fabricada en plástico simi- . compuesto por placa difusora de plástico, con ranuras ra-diales para movimiento de rotación a derecha. La elevada inducción generada provoca una rápida disminución de tempe-ratura y velocidad en las .
Riser coaxial cables (Antenna donor Cable to BDA head end) shall be rated as riser cables and routed through a 2‐hour–rated enclosure. The feeder and riser coaxial cables (From BDA Head end to antennas or remotes) shall be rated as plenum cables that match the building’s fire rating and pathway survivability. See 1221 2016 TIA 16‐2
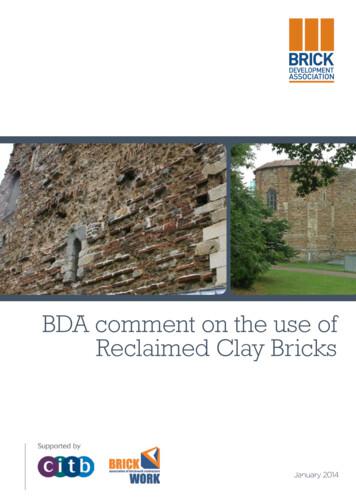
2 BDA Guide on the use of Reclaimed Clay Bricks The BDA offers the advice in good faith, bricks are durable and therefore sustainable and reusable. While it is true that bricks that have been produced under EN 771-1 in recent years are likely to last for 150 years this may not be true of recycled bricks.
A BDA system is an extension of a public safety radio system and it must be designed as such, with full understanding and consideration for the existing radio systems. Improperly designed BDA system can easily fail and produce a strong interference that impairs or even disables the entire public safety radio system .
dan kinetik dari neuromuskuloskeletal tulang belakang (1,2,3). II. Anatomi Tulang Belakang Lumbosakral 2.1 Elemen-Elemen Tulang 2.1.1 Vertebrae Lumbal Ukuran tulang vertebrae lumbal semakin bertambah dari L1 hingga L5 seiring dengan adanya peningkatan beban yang harus disokong. Pada bagian depan dan sampingnya, terdapat sejumlah foramina kecil untuk suplai arteri dan drainase vena. Pada bagian .


