How To Layout An Assignment - Rynagh McNally IT Notes
How to Layout an AssignmentUsing Microsoft Word 2010Table of Contents1.Cover Page . 1Complete Cover Page . 1Delete Unrequired Areas . 1Add Additional Text Boxes. 12.Heading Styles . 2Add Headings/Sections. 2Add Assignment Content. 23.Contents Page. 3Add A Blank Page . 3Add A Contents Page To The Blank Page. 3Update Contents Menu . 34.Header . 4Add Header . 4Header & Footer Tools . 45.Footer & Page Numbers . 4Add Footer . 4Format Page Number . 5
1. Cover PageOpen a blank Microsoft Word Document by clicking on the blue Word W.Go to the Insert tab and in the Pages group click on the Cover Pagebutton, which will show a drop down menu of cover pages. Thismenu has a scroll bar to allow different cover pages which arecurrently available (more options can be downloaded fromMicrosoft.com).COMPLETE COVER PAGE: Complete the Cover Page by filling in theinformation required by the tutor. This could include students name,course title, module title, assignment name and due date amongother details.FORMATTING: These auto areas can be formatted using the usualformat methods. The font style, size, colour, etc. can all be changed.DELETE UNREQUIRED AREAS: If there are any unrequired automaticareas click on the light blue bar at the top of the area and press thedelete key.For example to remove this Date auto area, click on the blue wordYear and press the delete key on the keyboard.ADD ADDITIONAL TEXT BOXES: To add additional text boxes go to theInsert tab and select Shapes in the Illustrations group. Choose theText Box shape add it to the page and enter the text required.When the text box has been added, theoutline and background colour can beturned off using the Shape Fill and theShape Outline. Leaving the text boxdisplaying only the text.1
2. Heading StylesAssignments are usually broken down into different sections. In this example, the assignment is about PolyTunnels and will have the following sections – Introduction, Where to Build, Materials, What to Plant,When to Plant and Conclusion.ADD HEADINGS/SECTIONS: Each of the sectionsshould be added to the assignment and set toHeading 1 (Note: it does not matter if theassignment is created first and the Heading Stylesare added after but it is easier to create all theheadings at the start of the assignment).SET TO HEADING 1: To do this, type the heading,highlight the text and assign the heading style byclicking on it.Each of the headings should set to Heading 1 (this isvery important for creating the Contents Page).ADD ASSIGNMENT CONTENT: To addcontent/text after each of the headingsclick after them and create a newparagraph by clicking on the enter key.The text will then changed over to theNormal style which is what the majorityof the text in the assignment should beset too.REMEMBER: When creating an assignment allheadings should be set to Heading 1 and all contentshould be set to Normal.STYLE SET: To change the Style Set or Colours of the HeadingStyles being used go to the Styles and select a Style Set and Colouras required. To display the different Style Sets hover over thenames to see a preview of the finished text.2
3. Contents PageTo create a contents page it is very important that each of the headings or sections is set to Heading 1 inStyles on the Home menu (to do this view the previous section).ADD A BLANK PAGE: After each heading is set to Heading 1, go tothe second page of the document after the first contents page andinsert a blank page as shown here by going to Insert tab, Pages groupand click on the Page Break button. This will insert a new blank pageto put the contents page on.ADD A CONTENTS PAGE TO THE BLANK PAGE: Click at the topof the blank page and select the References tab then go to theTable of Contents button, this will show a drop down menuwith Automatic Table options. Choose the first Contentsoption and the table will be automatically added to the blankpage.UPDATE CONTENTS MENU: As thedocument is updated the pagenumbers and heading titles may needto be updated. To do this click on theUpdate Menu at the top of thecontents, right click and selectupdate page numbers only to updatepages or update entire table toupdate page numbers and text of thecontents.3
4. HeaderADD HEADER: To add a header go to the second page of the document(after the cover page) and select Insert tab and Head & Footer groupand select the Header button. This will drop open the header optionsselect an appropriate header for the document. Type the relevantinformation into the header for example the module title, assignmenttitle or authors name.HEADER & FOOTER TOOLS: when the header or footer isturned applied, automatically the Header & Footer Tools areopened. Note that this menu is only available when the mouseis clicked into a header or footer area. The quick method ofopening this menu is to double click and to close click out of it.From this menu a variety of header and footer options can beapplied such as Navigation and Position options.5. Footer & Page NumbersADD FOOTER: The footer of a document is applied in the sameway as the header of the document. Typically the footer of adocument contains the page number. To add the page numberclick on the Insert tab and select the Footer button, choose anappropriate footer for the document and it will automaticallybe applied.4NOTE: The header and footer of adocument are visible on every page of thedocument except the cover page, unlessthe different first page button on theHeader and Footer is selected.
FORMAT PAGE NUMBER: To format the page number to start a 0zero and not have a page number on the first page.Click into the footer and select Page Number and Format PageNumber, in the Page Number Format set the Start at: 0.ADDITIONAL NOTES:5
to put the contents page on. ADD A CONTENTS PAGE TO THE BLANK PAGE: Click at the top of the blank page and select the References tab then go to the Table of Contents button, this will show a drop down menu with Automatic Table options. Choose the first Contents option and
All 13 Layouts use White Daisy CS for bases, so you will need 26 sheets for your layouts. Whisper CS #3 4 x 12 Layout B 4 x 12 Layout B 4 x 12 Layout C Whisper CS #4 4 x 12 Layout C 4 x 12 Layout C 4 x 12 Layout C Saffron Letter B&T #1 (letters facing sideways) 6 x 10 ½ Layout A 6 x 8 Layout A 6 x 4 Layout K 6 x 1 ½ Cricut
Oct 30, 2014 · EE501 Lab 6 Layout and Post-layout Simulation Report due: Oct. 30, 2014 Objective: 1. Practice analog layout techniques 2. Practice post-layout simulation Tasks: 1. Layout the two stage amplifier designed in Lab 4(As shown in Fig 1) Common centroid layout of the fi
GEOG 1303 World Regional Geography World Regional Geography Signature Assignment . Course Assignment Title Assignment ID (to be assigned) Outcomes/Rubrics to be Assessed by the Assignment Assignment Description For this assignment students must analyze an issue related to world regional geography. Students will research the issue using .
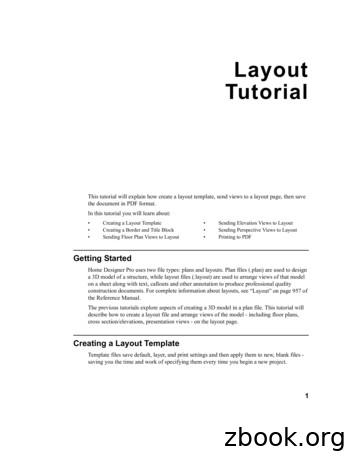
1 Layout Tutorial This tutorial will explain how create a layout template, send views to a layout page, then save the document in PDF format. In this tutorial you will learn about: Creating a Layout Template Creating a Border and Title Block Sending Floor Plan Views to Layout Sending Elevation Views to Layout
process or functional layout and combination or group layout. Each kind of layouts is explained with respective advantages, disadvantages and application as under. 1. Fixed or Position Layout Fixed or position layout is also known as project layout. A typical fixed layout is shown in Fig.1.1. In this
Assignment 3A: Fractals Assignment by Chris Gregg, based on an assignment by Marty Stepp and Victoria Kirst. Originally based on a problem by Julie Zelenski and Jerry Cain. JULY 12, 2017 Outline and Problem Description Note: because of the reduced time for this assignment, the Recursive Tree part of the assignment is optional.
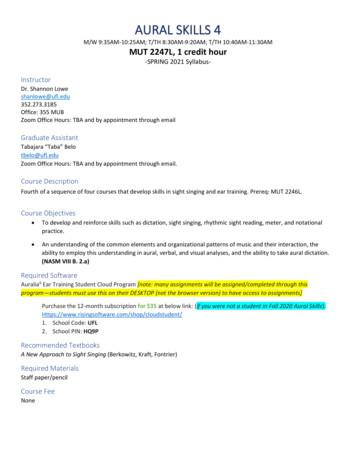
Week 8: March 1 st-5 th Dictation Assignment 6/Singing Assignment 6/Rhythmic Assignment 6 due by 11pm on Friday, March 5 th Week 9 : March 8 th-12 th Sight Singing and Rhythmic Sigh t-Reading Test 2 Week 10: March 15 th - 19 th Dictation Assignment 7/Singing Assignment 7/Rhythmic Assignment 7 due by 11pm on Friday, March 19 th Week 11: March 22 .
Submitting a file to a Turnitin assignment is similar to a Blackboard assignment. Turnitin will require a few steps to complete the submission process. To submit a file to a Turnitin assignment, locate the assignment in your course. Turnitin assignments contain the following icon: VIEW TURNITIN ASSIGNMENT


