Featuring TALLIN COLLECTION BY - Art Gallery Fabrics
featuring TALLINFREEPATTERNCOLLECTIONBYJESSICA SWIFT
Q U I LT D E S I G N E D B Y J E S S I C A S W I F TFAABULAFA B R I C S D ES I G N E D BY J ES S I C A SW I F TTAL-65300TIGRIS INDIGOTAL-65304TAL-65305ZIRKUSBAU PRIMARYTAL-65302ODESSA TRADITIONALETAL-65306LORE ROOFTOPTAL-65303SOFIA MIDNIGHTTAL-65307VILLAGE MEANDERFAIRYTALEBALTIC SWANS SKYTAL-65301MAGIJA PUMPKINTAL-75300TIGRIS LOLLIPOPTAL-75304BALTIC SWANS SANDTAL-75301MAGIJA OLIVETAL-75305ZIRKUSBAU CANDYTAL-75302ODESSA DREAMTAL-75306LORE COBBLESTONETAL-75303SOFIA SUNRISETAL-75307VILLAGE ADVENTURE 2018 Courtesy of Art Gallery Quilts LLC. All Rights Reserved.
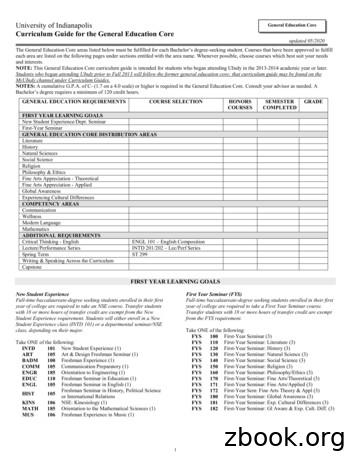
Fabric E:Cut two (2) 10 ½ x 10 ½“ squares.Cut one (1) 10 ½ x 5 ½“ rectangle.FINISHED SIZE 40” x 50"Fabric G:Cut two (2) 10 ½ x 10 ½“ squares.FA B R I C R E Q U I R E M E N T SFabric AFabric BFabric CFabric DFabric EFabric FFabric GFabric HFabric IFabric JFabric KFabric LFabric MFabric 75303TAL-75301TAL-75306PE- 404PE- 407PE- 414PE- 403PE- 430PE- 433Fabric F:Cut two (2) 10 ½ x 10 ½“ squares.Cut one (1) 10 ½ x 5 ½“ rectangle.½ yd.½ yd½yd.½ yd.½ yd.½ yd.½ yd.¾ yd.½ yd.½ yd.¼yd.½yd.¼ yd.½ yd.BACKING FABRICFabric GTAL-75301 2 yds. (Suggested)BINDING FABRICFabric FTAL-75303 (included)Fabric H:Cut two (2) 10 ½ x 25 ½” rectangles.Fabric I:Cut one (1) 20 ½ x 10 ½“ rectangle.Cut one (1) 10 ½ x 5 ½“ rectangle.Fabric J:Cut two (2) 10 ½ x 10 ½“ squares,Cut one (1) 10 ½ x 5 ½“ rectangle.Fabric K:Cut one (1) 10 ½ x 5 ½“ rectangle.Fabric L:Cut two (2) 10 ½ x 10 ½“ squares,Cut one (1) 10 ½ x 5 ½“ rectangle.Fabric M:Cut one (1) 10 ½ x 5 ½“ rectangle.Fabric N:Cut twenty (20) 5 ½ x 5 ½” squares.CONSTRUCTIONCUTTING DIRECTIONS¼" seam allowances are included.WOF means width of fabric.Fabric A:Cut one (1) 20 ½ x 10 ½“ rectangle,Cut one (1) 10 ½ x 5 ½“ rectangle.Sew all rights sides together with ¼"seam allowance. Flying Geese construction: For the larger Flying Geese blocks (the centerrow), you'll need fabrics A, B, C, D and Irectangles 20 ½“ x 10 ½", and two (2) 10 ½ x 10 ½”squares from fabrics G, J, F, L and E.Fabric B:Cut one (1) 20 ½ x 10 ½“ rectangle,Cut one (1) 10 ½ x 5 ½“ rectangle. Place a marked 10½'' square from Fabric G rightFabric C:Cut one (1) 20 ½ x 10 ½“ rectangle,Cut one (1) 10 ½ x 5 ½“ rectangle. Stitch on the drawn line. Trim seam allowance toFabric D:Cut one (1) 20 ½ x 10 ½“ rectangle.a r t g a l l e r y f a b r i c s. c o msides together on the left side of a 20½'' x 10½''rectangle from Fabric A as shown.¼''. Press corner open. In the same manner, sewa 10 ½'' square to the remaining corner, trim andpress.
I&Nx1 Repeat flying geese construction with fabricsJ&NDIAGRAM 1B and Jx1K&NL&N C and FM&Nx1 Next you will construct (2) rows (Rows A and C)made from all your smaller Flying Geese units. D and L For Row A, pair the B-N Flying Geese piecex1 I and Ewith the A-N piece right sides together and sew.Repeat the same process to complete the row inthe following formation: After you finish with the flying geese row attachx1Fabric H rectangle (10 ½ x 25 ½”) to the E & Ncombination.B&N Make one (1) each of the following Flying Geeseunits in the smaller size using the following fabriccombinations:A&N Use Fabrics A,B,C,E,F,I,J,K,L,M 10½" x 5½"rectangles and fabric N 5 ½" squaresB&NA&NF&NC&NE&NF&NC&NE&NDIAGRAM 2a r t g a l l e r y f a b r i c s. c o m
For Row C, repeat the process for Row A tomake another Flying Geese row in the followingformation:I&E After you finish with the flying geese row attachFabric H rectangle (10 ½ x 25 ½”) to the M & Ncombination. Refer to the diagram below:D&LI&NC&FJ&NB&JK&NA&GDIAGRAM 4L&N Place Row A and Row B right sides together andsew.M&N Next place Row B and Row C right sidestogether and sew. This completes your quilt top!Q U I LT A S S E M B LYSew rights sides together.DIAGRAM 3 Place BACKING FABRIC on a large surface wrongside up. Stretch it with masking tape against thatsurface. Place BATTING on top of backing fabric. You should now have a total of (2) rows sewn,made from all your smaller Flying Geese units. Next you’ll construct the center row (Row B)made of the larger Flying Geese pieces. Pair theA-G Flying Geese piece with the B-J piece rightsides together and sew. Continue sewing, right sides together, tocomplete the Row B in the following formation: Place TOP on top of the batting with right sidefacing up. Smooth away wrinkles using yourhands. Pin all layers together and baste with bastingthread, using long stitches. You can also usesafety pins to join the layers. Machine or hand quilt starting at the center andworking towards the corners. Remember thatquilting motifs are a matter of personal preference. Have fun choosing yours! After you finished, trim excess of any fabric orbatting, squaring the quilt to proceed to bind it.a r t g a l l e r y f a b r i c s. c o m
BINDINGSew rights sides together. Cut enough strips 1½" wide by the width of the fabricF to make a final strip 265" long. Start sewing thebinding strip in the middle of one of the sides of thequilt, placing the strip right side down and leavingan approximated 5" tail. Sew with ¼" seam allowance(using straight stitch), aligning the strip’s raw edgewith the quilt top’s raw edge. Stop stitching ¼" before the edge of the quilt (DIAGRAM B 1). Clip the threads. Remove the quilt fromunder the machine presser foot. Fold the strip in amotion of 45 and upward, pressing with your fingers(DIAGRAM B2). Hold this fold with your finger, bringthe strip down in line with the next edge, making ahorizontal fold that aligns with the top edge of thequilt (DIAGRAM B3). Start sewing at ¼" of the border, stitching all the layers. Do the same in the fourcorners of the quilt.Stop stitching hereDIAGRAM B1DIAGRAM B2DIAGRAM B3fold45 Stop stitching before you reach the last 5 or 6 inches.Cut the threads and remove the quilt from underthe machine presser foot. Lay the loose ends of thebinding flat along the quilt edge, folding the endsback on themselves where they meet. Press themtogether to form a crease. Using this crease as thestitching line, sew the two open ends of the binding with right sides together (you can help yourselfmarking with a pencil if the crease is difficult to see). Trim seam to ¼" and press open. Complete the sewing. Turn binding to back of the quilt, turn raw edgeinside and stitch by hand using blind stitch. Congrats! You've finished your Tallin Quilt!a r t g a l l e r y f a b r i c s. c o mNOTE: While all possible care has been taken to ensurethe accuracy of this pattern, We are not responsiblefor printing errors or the way in which individual workvaries.Please read instructions carefully before starting theconstruction of this quilt. If desired, wash and iron yourfabrics before starting to cut. 2018 Courtesy of Art Gallery Quilts LLC. All Rights Reserved.a r t g a l l e r y f a b r i c s. c o m
tal-75302 odessa dream tal-65306 lore rooftop tal-75306 lore cobblestone tal-65303 sofia midnight tal-75303 sofia sunrise tal-65307 village meander tal-75307 village adventure faabula fairytale. artgalleryfabrics.com finished size 40” x 50" fab
Secret Code featuring Alice A Song from My Heart featuring Layla Home Away from Home featuring Ginger The Curious Castle featuring Reese Stuck in the Middle of Knowhere featuring Coral A Garden Where Friendship Grows featuring Nahla A Fair Share at the Diner featuring Isa & Noa The Incredible Ice Cream Project featuring Lorelei Party Plans Go Pop! featuring Sia .
Oct 22, 2014 · ART ART 111 Art Appreciation ART 1301 Fine Arts ART 113 Art Methods and Materials Elective Fine Arts . ART 116 Survey of American Art Elective Fine Arts ART 117 Non Western Art History Elective Fine Arts ART 118 Art by Women Elective Fine Arts ART 121 Two Dimensional Design ART 1321 Fine Arts ART
ART-116 3 Survey of American Art ART ELECTIVE Art/Aesthetics ART-117 3 Non-Western Art History ART ELECTIVE Art/Aesthetics OR Cultural Elective ART-121 3 Two-Dimensional Design ART ELECTIVE Art/Aesthetics ART-122 3 Three-Dimensional Design ART ELECTIVE Art/Aesthetics ART-130 2 Basic Drawing
ART 110 . Art Appreciation (2) ART 151 . Introduction to Social Practice Art (3) ART 281 . History of Western Art I (3) ART 282 . History of Western Art II (3) ART 384 . Art Since 1900 (3) ART 387. History of Photography (3) ART 389 . Women in Art (3) ENGL 270 . Introduction to Creative Writing (3)* HON 310 . Art in Focus (3)** each semester .
Printmaking/Digital Media: Art 231, Art 235, Art 270, Art 331, Art 370, Art 492 Painting: Art 104, Art 203, Art 261, Art 285, Art 361, Art 461, Art 492 The remaining 21 credits of Fine Arts electives may be selected from any of the above areas as well as
ART GLO: ART 103: History of Non-Western Art 3: F2 903N ARTH: Elective ART: GLO ART: 104 History of Photography: 3 F2 904: ARTH Elective: 3 ART: GLO ART: 105 Gender and Art: 3 F2 907D: ARTH Elective: 3 ART: GLO ART: 106 Contemporary Art 1945 to Present: 3 F2 902: ARTD Elective: 3 ART: GLO ART: 110 Design I:
ART V02A Intro to Hist of Western Art I 3 ARHS 200 Art of Western World I 3 EHAP, TCNA ART V02B Intro to Hist of West Art II 3 ARHS 2XXX Intro to Hist of West Art II 3 EHAP, EHAP ART V02C Intro to Non-Western Art 3 ARHS 2XXX Intro to Non-Western Art 3 ART V02D Art of Ancient Mediterranean 3
Your sheet-pile program FADSPABW (B-9) is a special case of this method. It was separately written, although several subroutines are the same, because there are special features involved in sheet-pile design. These additional considerations would in-troduce unnecessary complexity into a program for lateral piles so that it would be a little more difficult to use. Many consider it difficult in .


