Modeling Basics Tutorial ZBrush V0 - Cruzio Internet
Modeling Basics TutorialZBrush v0.95Rev B
Modeling a HeadWritten by:Gary NelsonCopyright 2000 Pixologic, Inc.336 West 31st StreetLos Angeles, CA 90007Phone (888) 748-5967
About the Demo Software and TutorialsThe demo software is intended to give you a “taste” of the ZBrush concept. There is no Import/Export,Save , or Print capability. (You can however, save your files using the native .zbr format). Even with someother functions disabled, you will experience the power and ease of use inherent in the program. As in allpaint programs, you will have the most artistic control by using a stylus and pressure sensitive tablet. Makesure you are using the most recent “build” of the demo. Updates are available on our website.This Tutorial is intended to give you an overview of the application. Many of the “deeper” controls andcapabilities are not explained here.We will be constantly adding Tutorials, Examples, and Objects to our website.
1ChapterGETTING STARTEDTHE SCOPE OF THIS TUTORIALThe purpose of this tutorial is to introduce you to some of the tools andtechniques used in ZBrush to produce objects for export , or to be usedin ZBrush scenes. Modeling in ZBrush is much like sculping with clay. Infact, because of the Undo and Symmetry controls, it is easier!THE TOOL MENUIn the Tool Palette, choose Tool/Sphere 3D. For modeling heads, its bestto start with a 3D sphere and then edit its shape.MAKE THE SPHEREIn the work area, click in the center, and then drag straight down toproduce a 3D sphere. This will produce a sphere aligned facing you. Ifyou make it off center or the wrong size, simply Undo (cntrl-Z) and tryagain. ZBrush has 32 levels of Undo and Redo (cntrl-shift-Z).
2ChapterTHE EDITING TOOLSABOUT HOT KEYSMove the cursor over the Edit button in the Transform window. After afew seconds, the name of the function appears, along with a Hot Keyshortcut in red parenthesis, in this case the letter “T”. If you now pressthe control key, a more detailed description of the function appears.Pressing the letter “T”has the same effect as pressing the Edit button.THE TRANSFORM TOOLSIf the Transform palette is not visible, press the transform icon on theicon bar.Now that you have a sphere object in the workspace, press Transform/Edit (or just press the letter “T”)to enter the Edit mode.Notice that the Depth and Color Items are no longer greyed out. TheDepth slider ranges from 100% to -100%.The Color slider rangesfrom 0 to 100%. The values can be set by manually moving the slider orclicking on the slider, then keying in the numerical value desired. Whenthe Depth slider is set to a positive value, it will pull selected areas of theobject being edited. If it is set to a negative value, it will push. The Colorslider determines how much color is added when editing.EDIT SIZEThe Size slider determiness the size of the area affected when using thetransform tools. The value may be set by sliding or keying in, just like allthe sliders in ZBrush.
3ChapterMODELING A HEADTURN ON SYMMETRYIn the Tool Pallette, turn on Modifiers/symmetry/x. This causes theediting tools to act in a symetrical manner over the x axis. Since faces aresymetrical left/right, and this symetry is relative to the object, not theview, this is a great modeling feature.FIRST, THE EYESOCKETSSet the Transform Depth to -25 to push in and the Edit Size to 20 to setthe size of the sockets. Move the cursor over the sphere and you will seetwo red dots. These indicate where the edit action will take place. If theyare not perfectly aligned, don’t worry, its because you did not pull downperfectly straight when you made the sphere. Go ahead and place themwhere you want eyes and click , then drag in small circles. Remember,you have Undo and Redo to give you as many tries as you need.Now you have some eye sockets, but they might not be aligned perfectly. Notice that if you click and drag anywhere in the black, you canrotate the head to any angle. If you rotate, and then hold down the shiftkey, you can snap to the next 45 degree increment. Snap the head tolook straight at you.
ADD THE EARSIn the Transform Pallette, choose the Move icon(or just press the “W”key).Position the cursor over the sphere toput the 2 red dots where you want theears and click and drag out.Now set the Transform icon back to“Draw Pointer” or press the “Q” key). Setthe Transform depth to -25 and hollowout the ears.
You can freely move the head by clicking anddragging anywhere in the black area. Position thehead so that you can see both ears well.Set the Transform icon back to “move object”(W), grab the tips of the ears and move themforward.THE NOSESet the Transform icon back to “Draw Pointer”or press the “Q” key).Now set the Transform Depth to 15, the EditSize to 20, turn symmetry off , and draw thenose.
COLOR FILLIf you do not see the Color Palette, press theColor icon to access the Pallette. Choose abrown color. Set the Color slider on the Transform Palette to 75. Press fill 1 at the bottom ofthe pallette. Now the color will fill the object at75% opacity and you can paint on it with theEdit tool.EYEBALLSTurn the symmetry back on and make someeyes. Set the Transform Depth to 25, the Transform Color to 25, and the Edit Draw size to 15.Set the Color picker for a nice blue and draw insome eyes.Notice that you can sculpt and apply a color atthe same time. If you wish to just paint on anobject, set the Transform Depth to 0, and thetransform color to 100 to be completely opaque.Set the Color to less then 100 to decrease itsopacity.SMILESet the Transform Depth to -5, the TransformColor to 25, and the Edit Draw size to 8. Set theColor picker for a dark red and draw in thesmile.
APPLY A DEFORMEROf course, heads are not often perfect spheres. One way tochange the entire model is to apply a Deformer to it. By adding20% gravity, the geometry is pulled downward resulting in amore pleasing shape.
4ChapterSAVE OR EXPORTIn the Demo software, you may save as a ZBrush scene file (.ZBR)The object will be converted to Pixols and may be reopened at a latertime, but will no longer be editable geometry.When you create an object in ZBrush, a new tool is created. In theRetail version, you can save the tool by choosing Tool/Modifiers/Inventory/Save As. It will be saved in the .ZTL format and can bereloaded at any time by going Tool/Modifiers/Inventory/Load.Also in the Retail version,you may export the object for use in other3D programs as an .OBJ file. Choose Tool/Modifiers/Inventory/Export. We are considering other export formats to support.So.you have seen the basics of how to modelin ZBrush. The example given was deliberatlysimple. There are .ZTL objects for you todownload on our website. And here is anexample of what is possible. She is a work inprogress at Pixologic.This concludes the Modeling BasicsTutorial. We will be adding new tutorialsand posting them to our website. Wewelcome suggestions and constructivecriticism, since these will eventually be inthe full manual.Please send your comments tosupport@pixologic.com
Legal NoticeTrademarksPixologic and the Pixologic logos are registered trademarks of Pixologic, Inc. ZBrush is atrademark of Pixologic, Inc.“Windows” is a registered trademark of Microsoft Corporation. “Pentium” is a registeredtrademark and “i486” is a trademark of Intel Corporation.CopyrightThis manual, as well as the software described in it, is furnished under license and may only beused or copied in accordance with the terms of the license. Program 1999 Pixologic, Inc.,including the look and feel of the product. Pixologic’s ZBrush Modeling Basics Tutorial 2000 Pixologic,Inc. No part of this guide may be reproduced in any form or by any means without the priorwritten consent of Pixologic, Inc.NoticeBefore using this software or reading this User Manual, make sure you have read, understood,and agreed to the license contained in the user manual.CreditsZBrush was created and engineered by Ofer Alon.The ZBrush Modeling Basics Tutorial was written by Gary Nelson. 2000 Pixologic, Inc. All rights reserved. The Pixologic logo and ZBrush are trademarks ofPixologic, Inc. Pixologic is a registered trademark of Pixologic, Inc. All other product names mentioned in the Program, manual, or other documentation are used for identification purposes only andmay be trademarks or registered trademarks of their respective companies. Registered and unregistered trademarks used herein are the exclusive property of their respective owners. Pixologic, Inc.,makes no claim to any such marks, nor willingly or knowingly misused or misapplied such marks.
THE SCOPE OF THIS TUTORIAL The purpose of this tutorial is to introduce you to some of the tools and techniques used in ZBrush to produce objects for export , or to be used in ZBrush scenes. Modeling in ZBrush is much like sculping with clay. In fact, because of the Undo and Symme
6 ZBrush 1.23 The ZBrush Interface The Document Window The document window, in the center of the ZBrush workspace, is where you draw and edit your image. The current document name appears in the upper-left corner of the window. The name defaults to ZBrush Document until you save the file, when it changes to the file name and path.
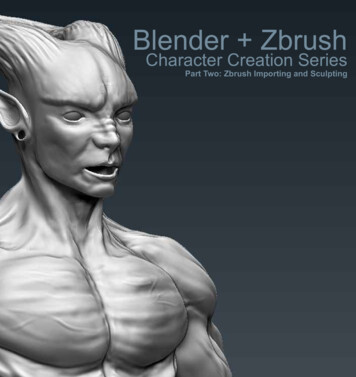
Part Two Zbrush Importing and Sculpting Forward In the second part of this tutorial series you will learn how to import the base mesh you created in part one to Zbrush. The basics of the Zbrush interface will be discus
ZBrush 2020 continues in the path of creativity and productivity with major new fea-tures allowing artists to work even faster. 5 ZBrush 2020 - About 1. Thumbnail Being able to clearly visualize a model’s thumbnail or silhouette is essential for mak -
ZBRUSH – O QUE É? O software ZBrush é a nova maneira de trabalhar com modelos digitais ˆ ˇ ˇ facilidades de uso e produção. Esqueça da edição poligonal através dos vértices, cortes precisos nas malhas, ou longos períodos de tra
ZBrush. With the release of ZBrush 4 (later referred to as Z4), Pixologic lets us stay in Z4 and thereby we don't have to worry about the things we have always had to worry about. I feel the new tools lets us be more
Personajes con Zbrush Cuesta de San Vicente, 4 28008 Madrid Telf: 34 915 41 51 51 www.trazos.net Información académica 01 Introducción 02 Certificados 03 Salidas Profesionales 04 Conexión Laboral Temario 01 Creación Avanzada de Personajes con Zbrush Proceso de matriculación 01 Proceso de matriculación 02 Precio DURACIÓN: 100 .
From a ZBrush standpoint, there are very few tools and settings to cover. The entire model was created with the Standard brush in Move or Draw mode, occasionally altering the focal shift. All you need to follow the tutorial is a basic familiarity with th
AutoCAD �は気に なっていましたよね。AutoCAD 2016 がその問題を解決 しました。システム変数 LINESMOOTHING を使えば、直 曲線も、どんなズー �。


